This is actually a simple exercise but if you are not a handyman and have the right tools it might get annoying. This is why I am trying to organise a groupbuy for this side panels.
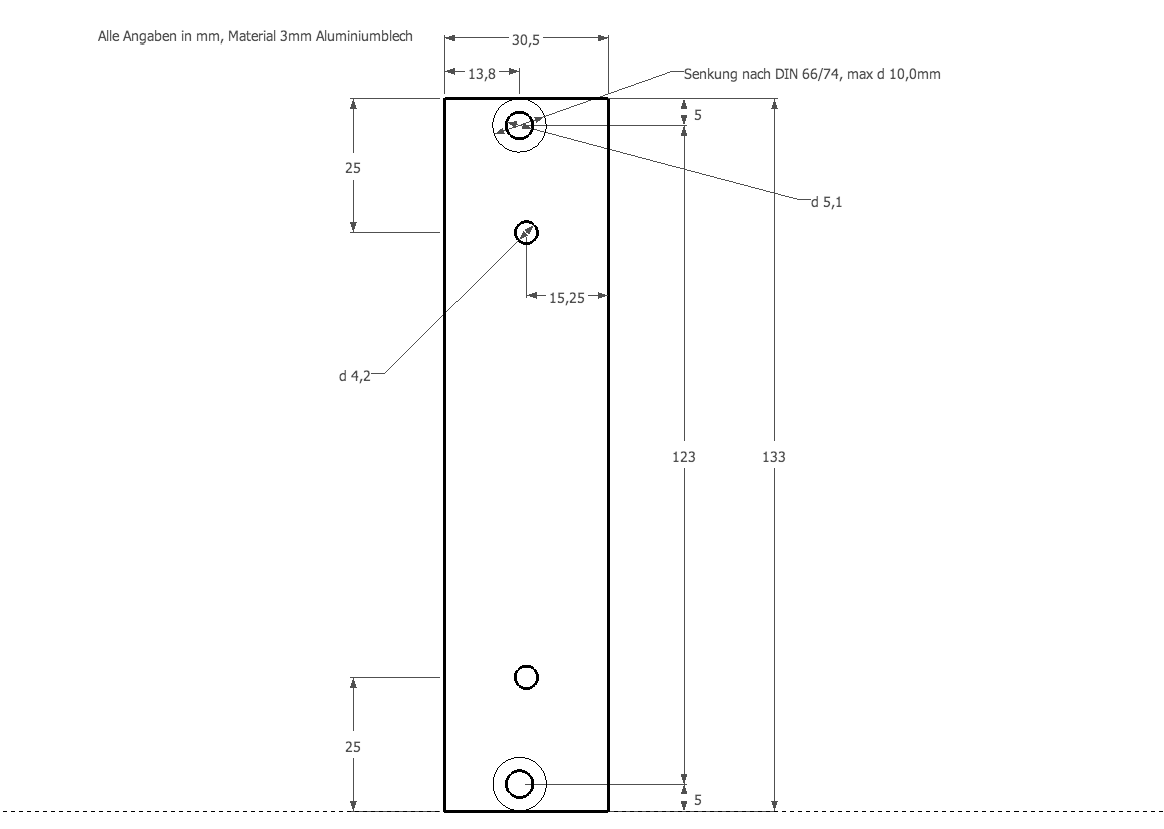
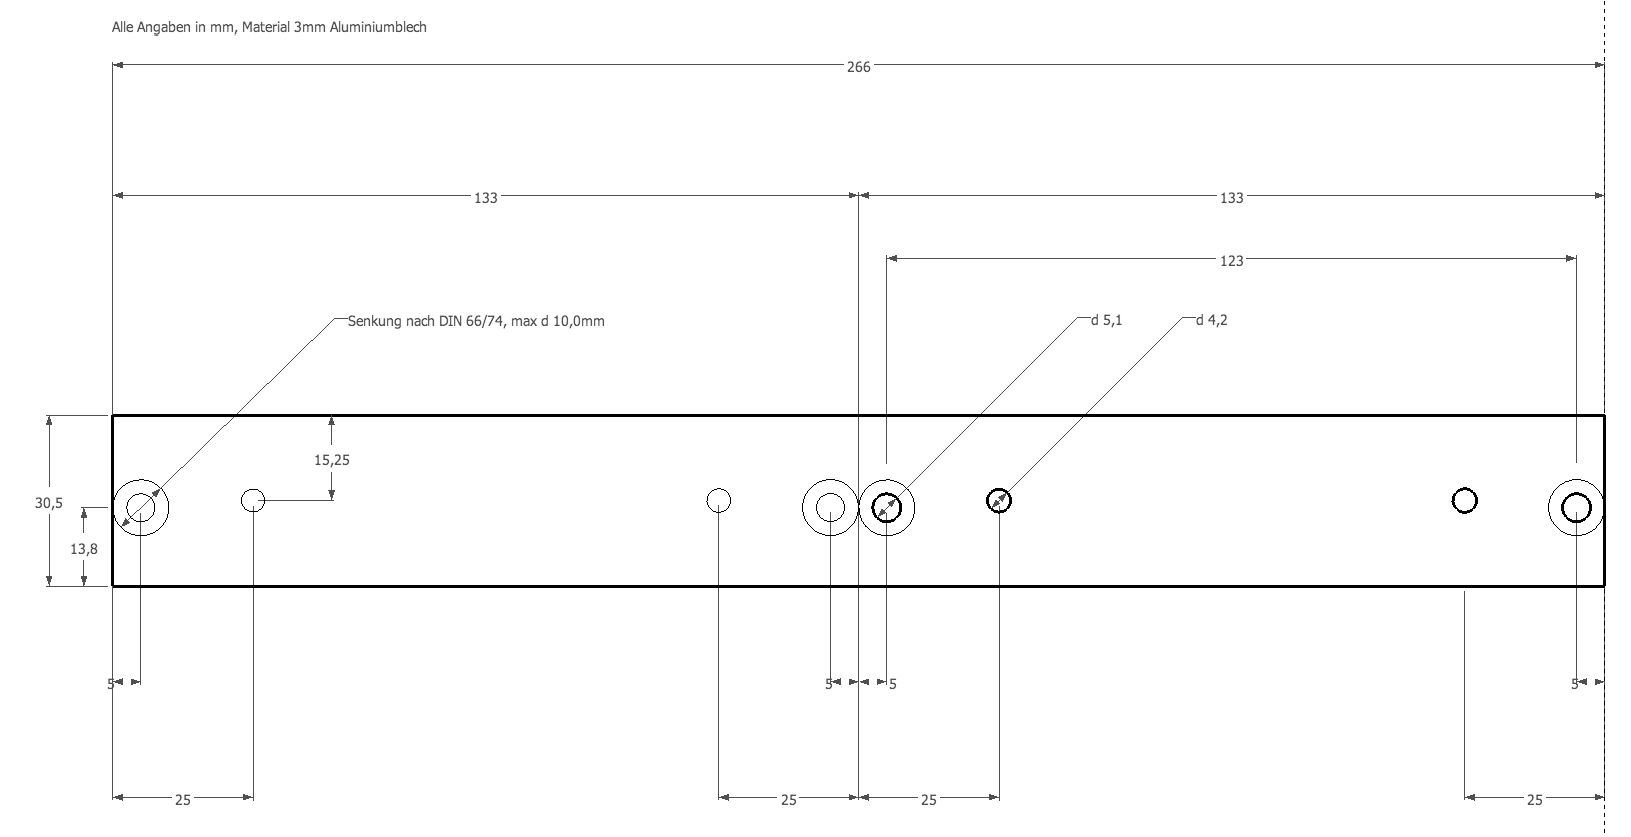
This is what it is all about. A prototype of a 3U side panel for fixing the rails on a rack (still missing the drillings for fixing). Sure, you can fix the rails directly on the rack, but using the panels is way more elegant. Sidepanels 3HE with Module
You will find more details on Muffwiggler or on the German Sequencer Forum. If you have questions just leave a comment or send an email
Assembling a 19 inch case is not rocket science but it has some pitfalls. Especially when you buy the components from eBay or different vendors.
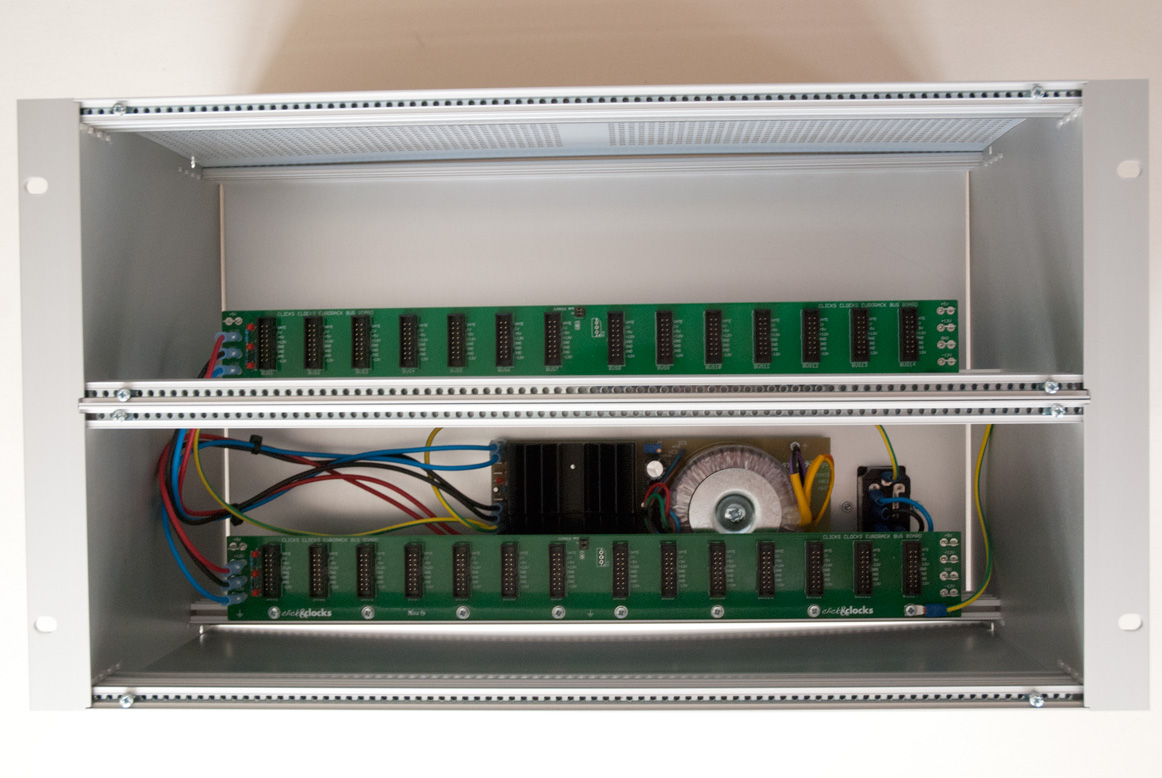
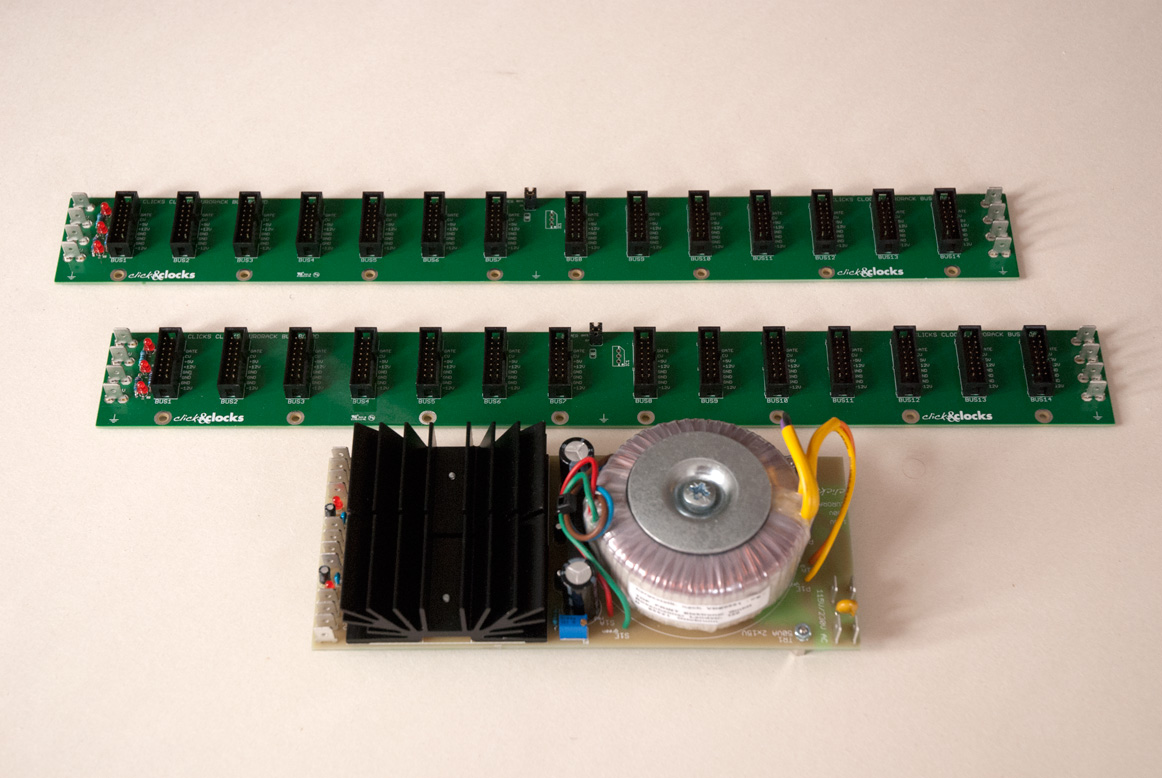
Before you start be aware that there is no standard, not all components from all manufacturers fit together. This post should give you an overview of the components you will need. The construction is based on the Doepfer A-100G6 rackmount cases. The parts of my construction are a mix of Roger and Gie-Tec parts as well as my own power supply (PSU) and busboards.
I can provide you with a complete DIY set for your case or just some parts, just ask for pricing. 19 inch Eurorack – Complete Case
Not to get confused, some rack systems use rails with M2.5 threaded strips. You will hardly fit M3 strips in these rails. Please also notice that my rack uses side panels which are already combined with the rack ears as one part. This is usually not the case.
Some rails use M4 threads instead of M5 for the side fixing. The parts of the list below fit perfectly together.
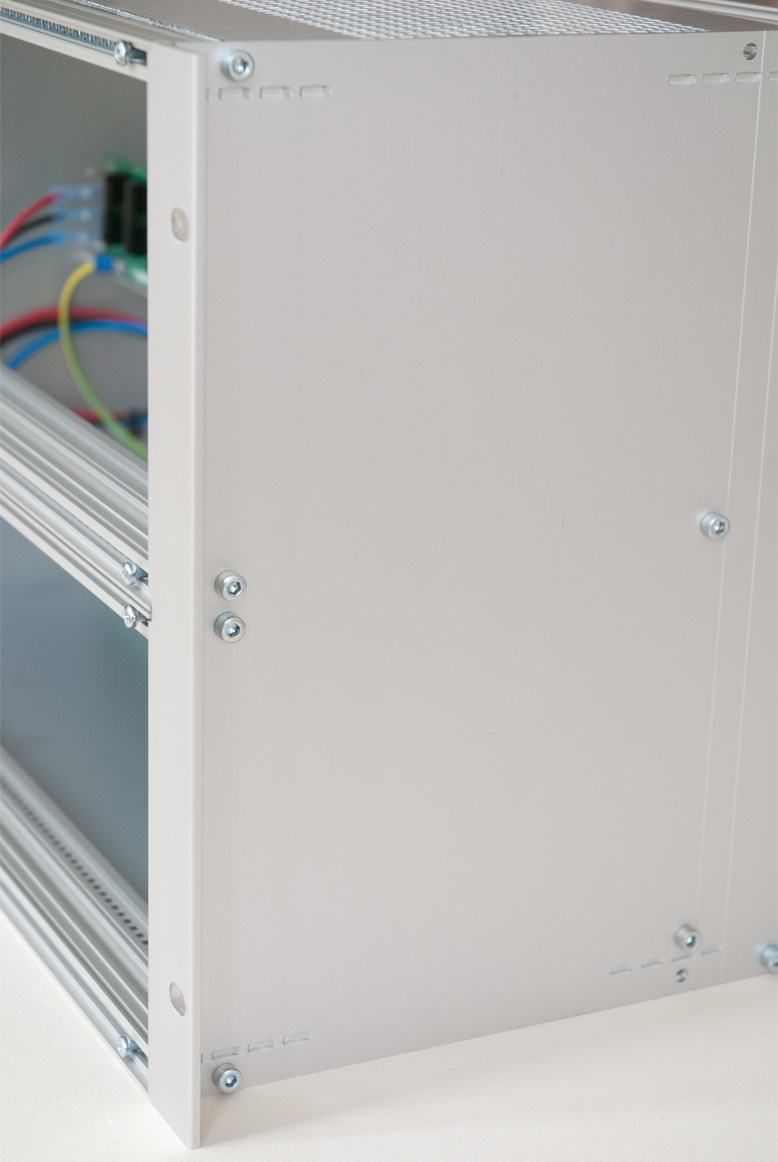
There is also some mechanical work that needs to be done, drilling holes to fit the PSU on the rear panel and filing a big hole to fit in the mains inlet and fuse holder also on the rear panel. But this is it.
List of mechanical rack parts with order numbers from Gie-Tec as of May 2013
4 pcs. 138006 – Rack ears 3HE
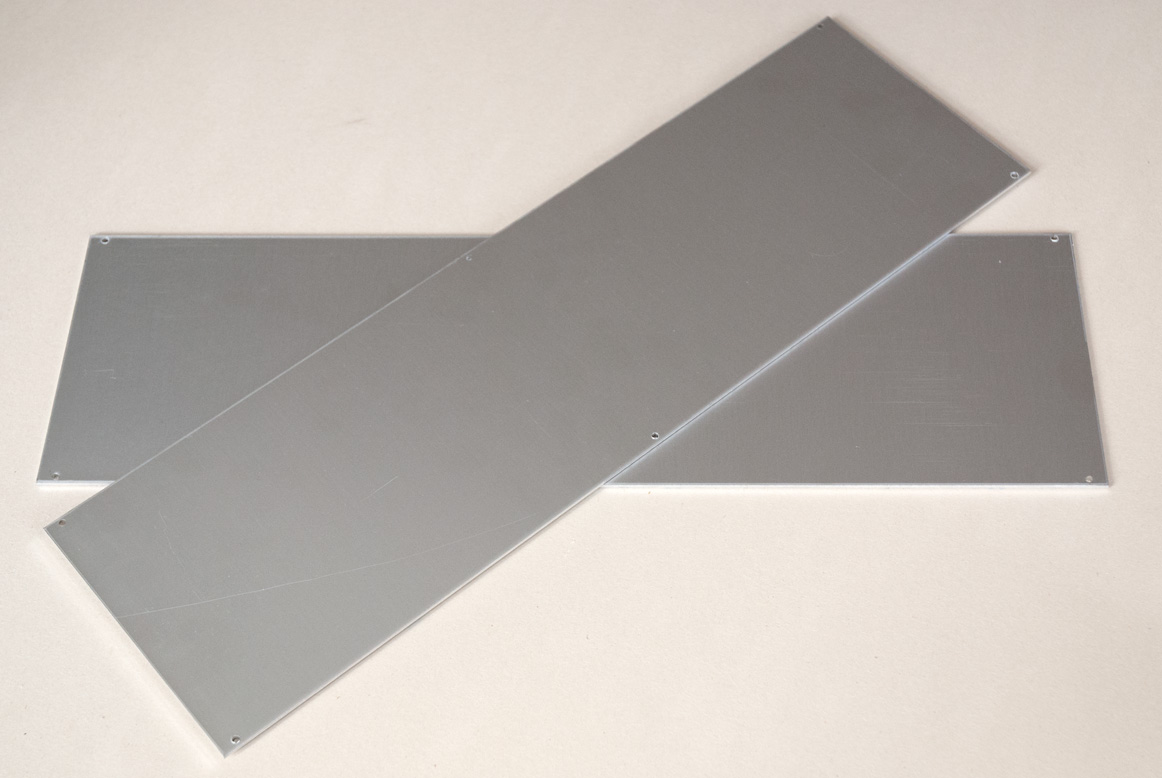
2 pcs. 138010 – Side panels 6U
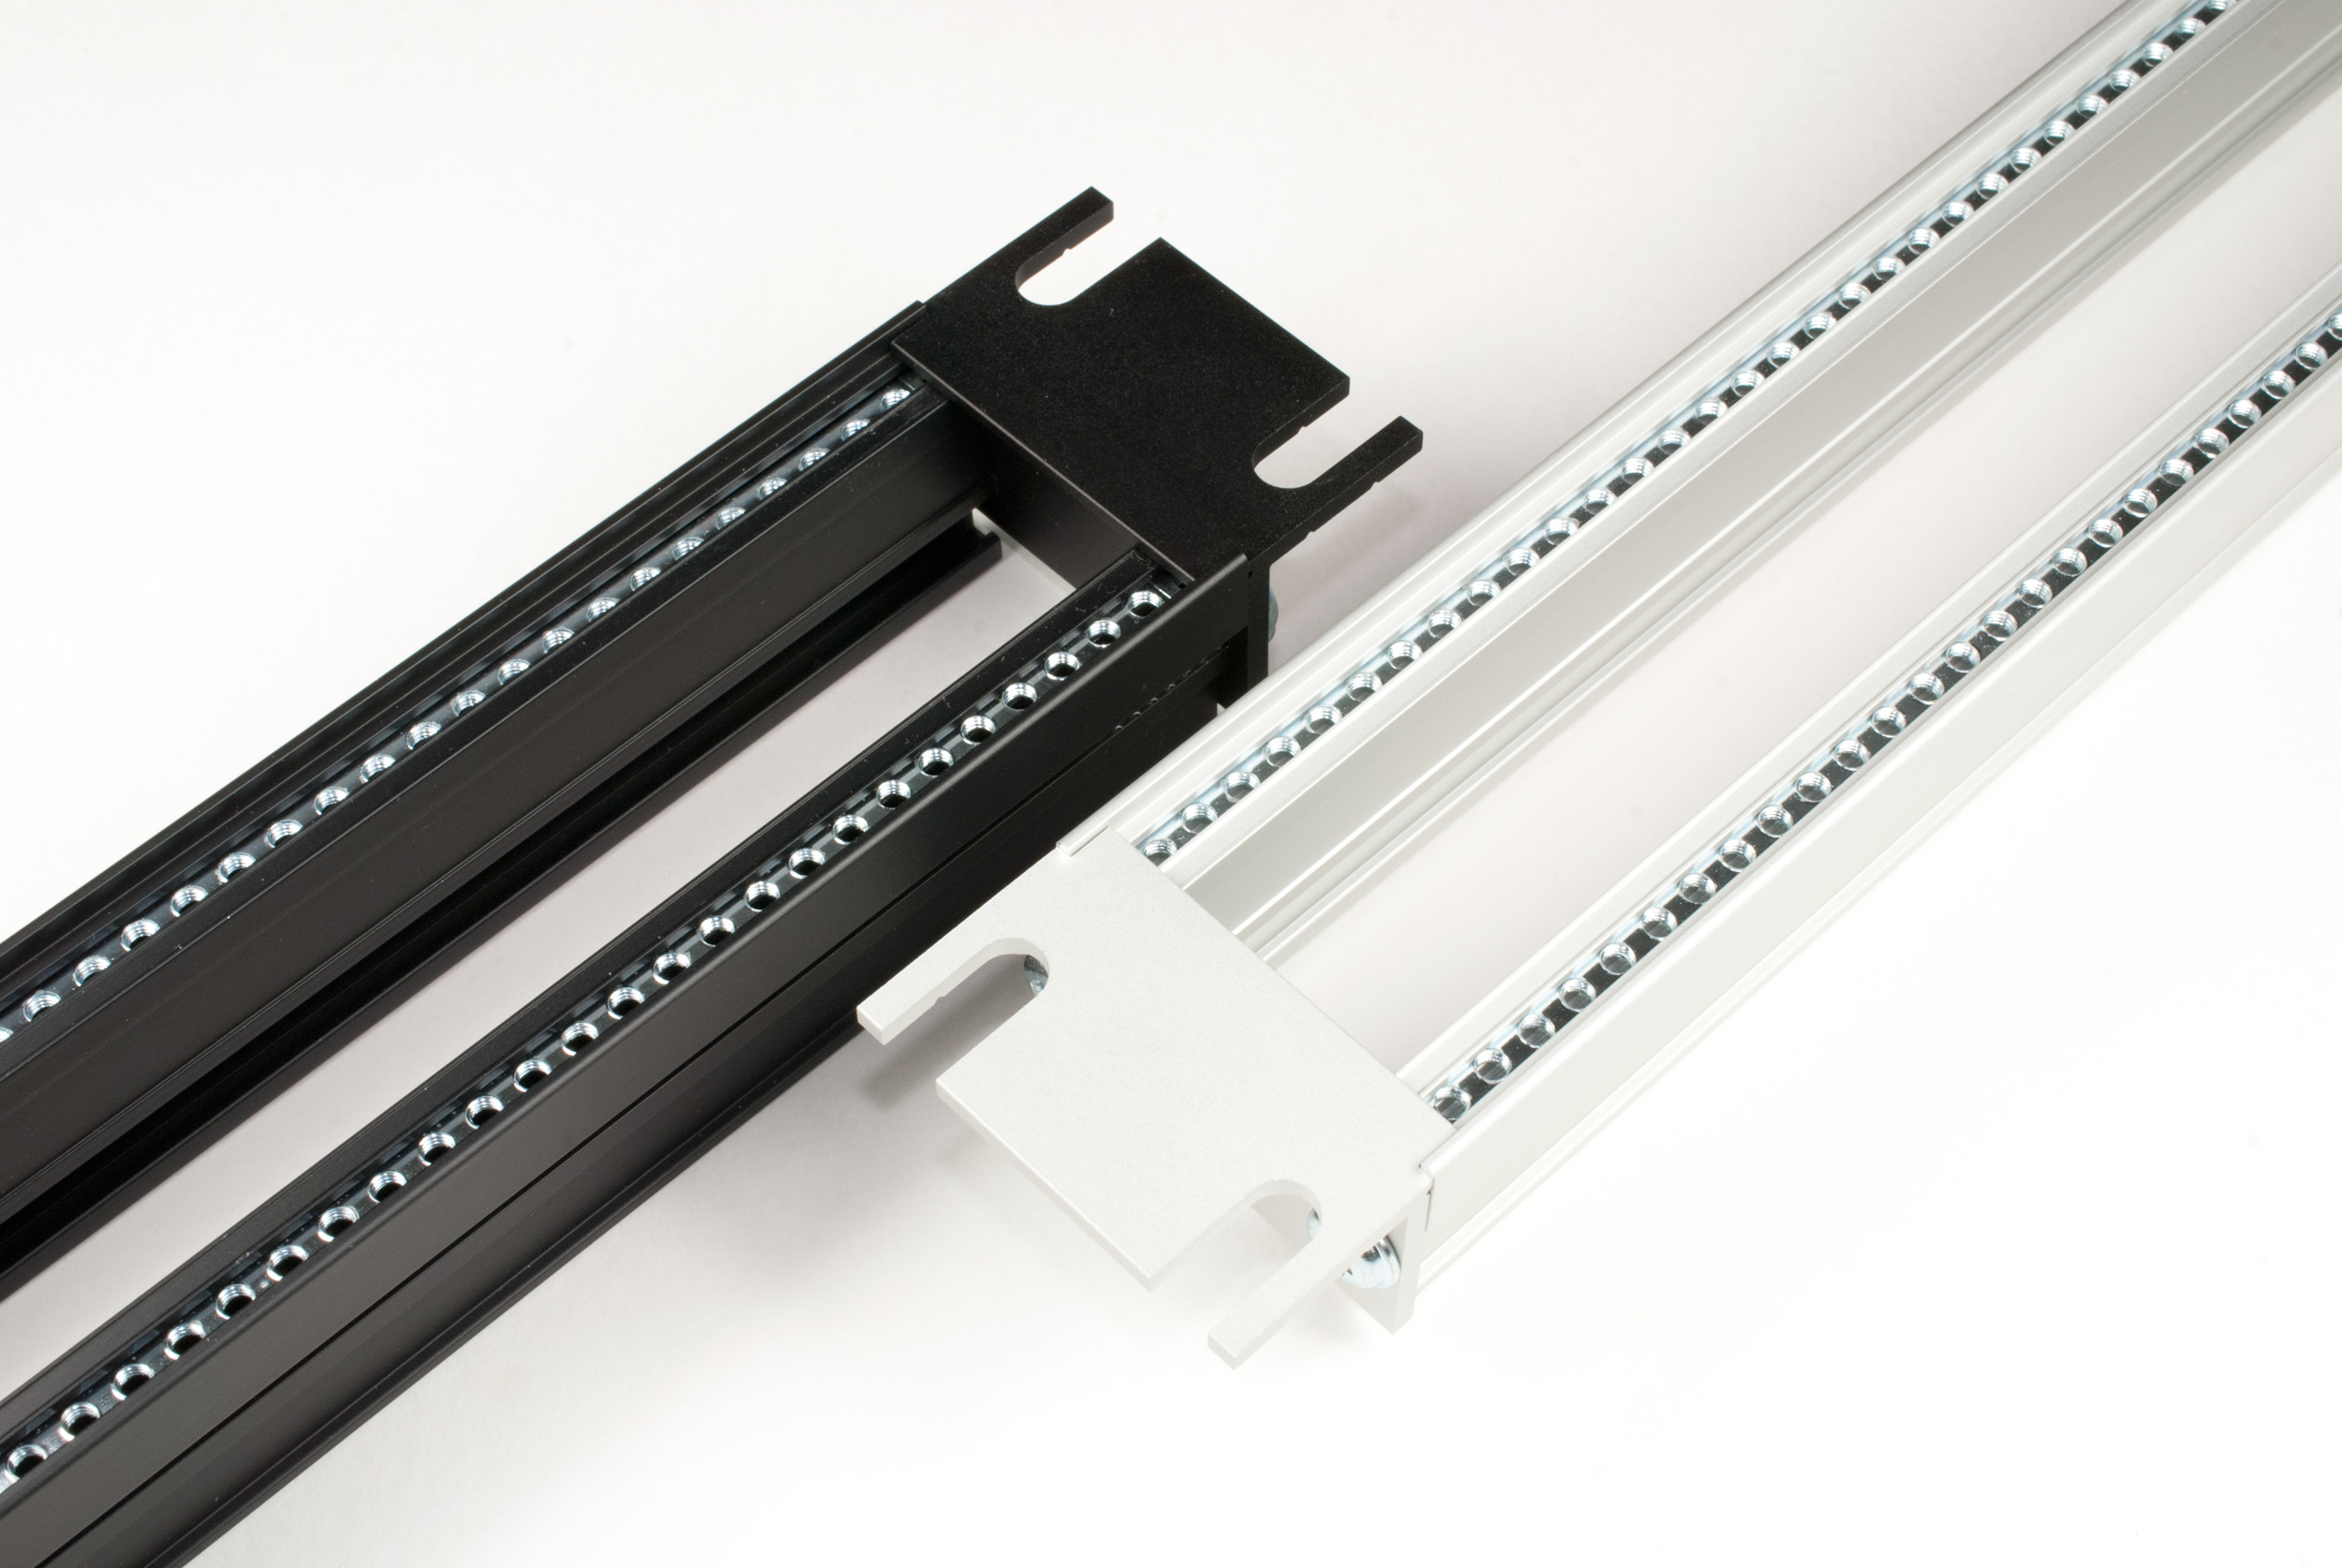
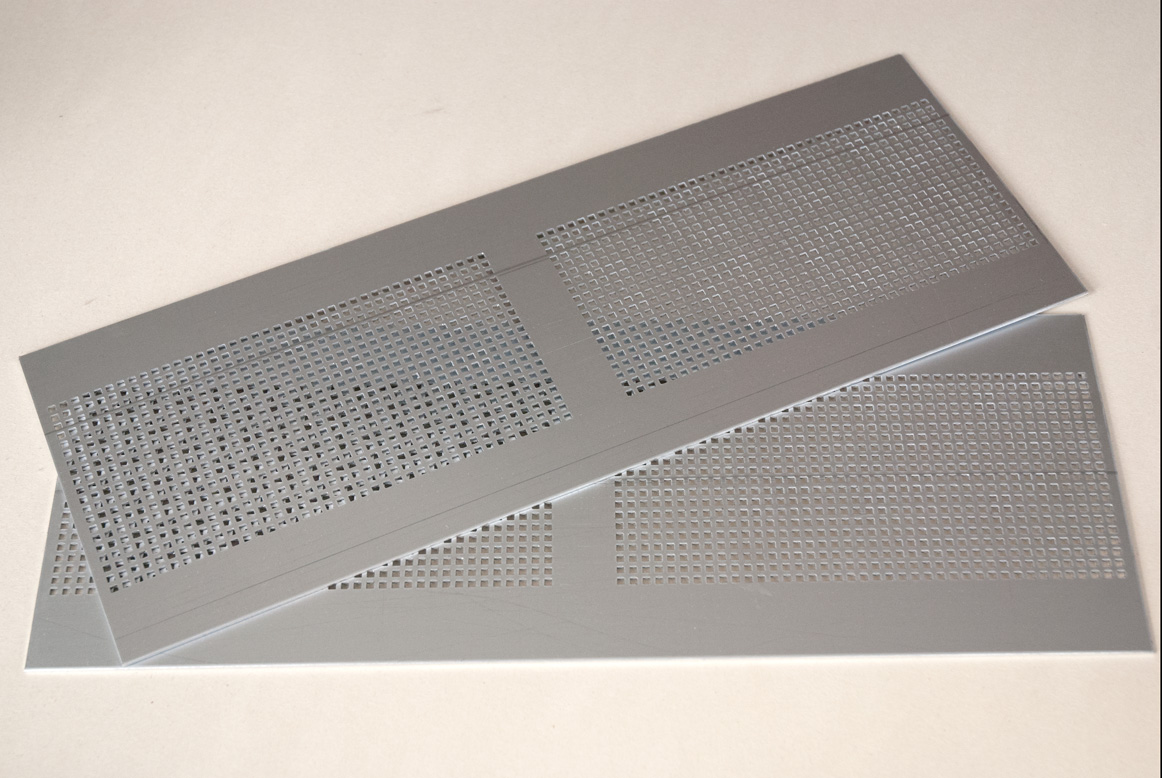
8 pcs. 125010 0432 – Rails type 1, non perforated, l=432mm, 85HP
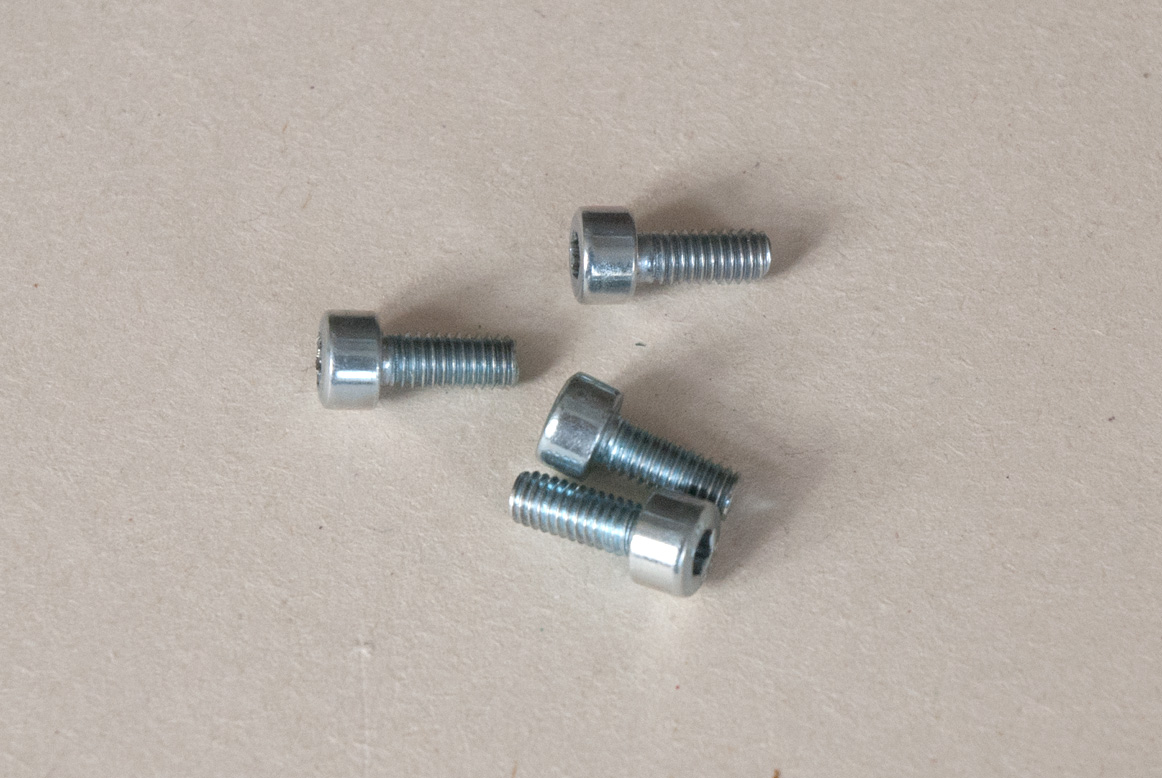
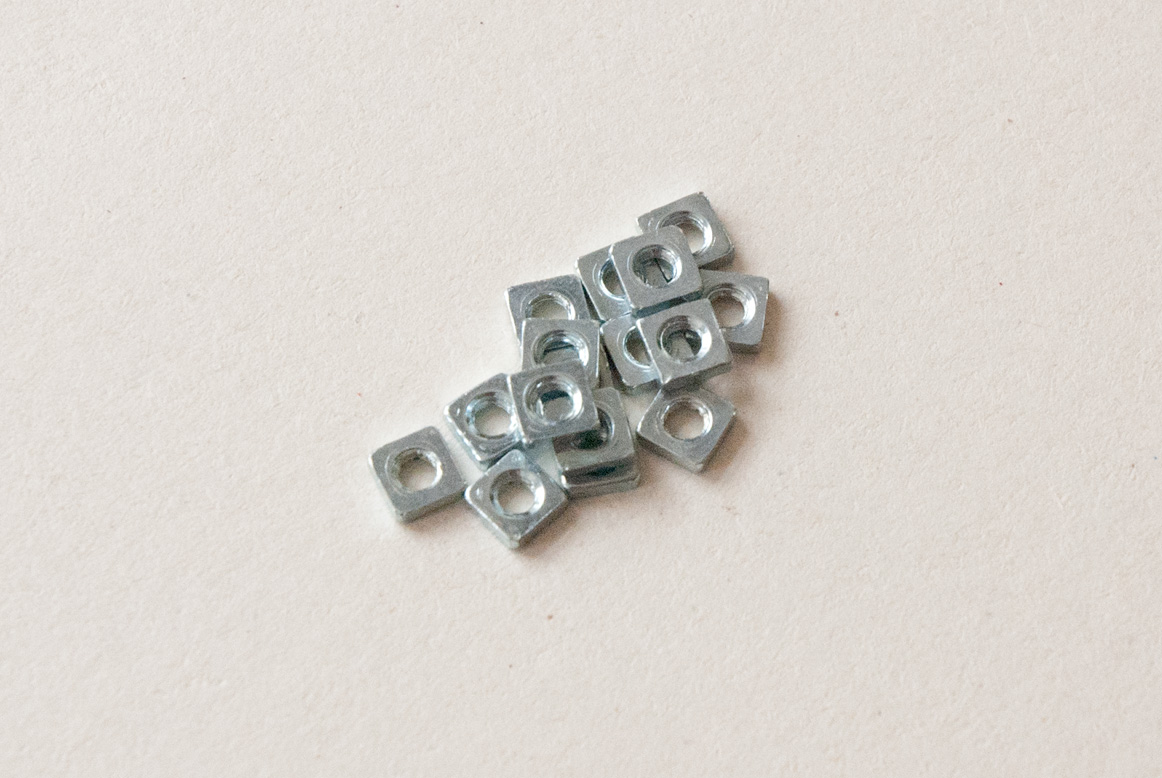
32 pcs. 493030 0066 – M3x6 Pan head screws, DIN 7985/ISO 7045
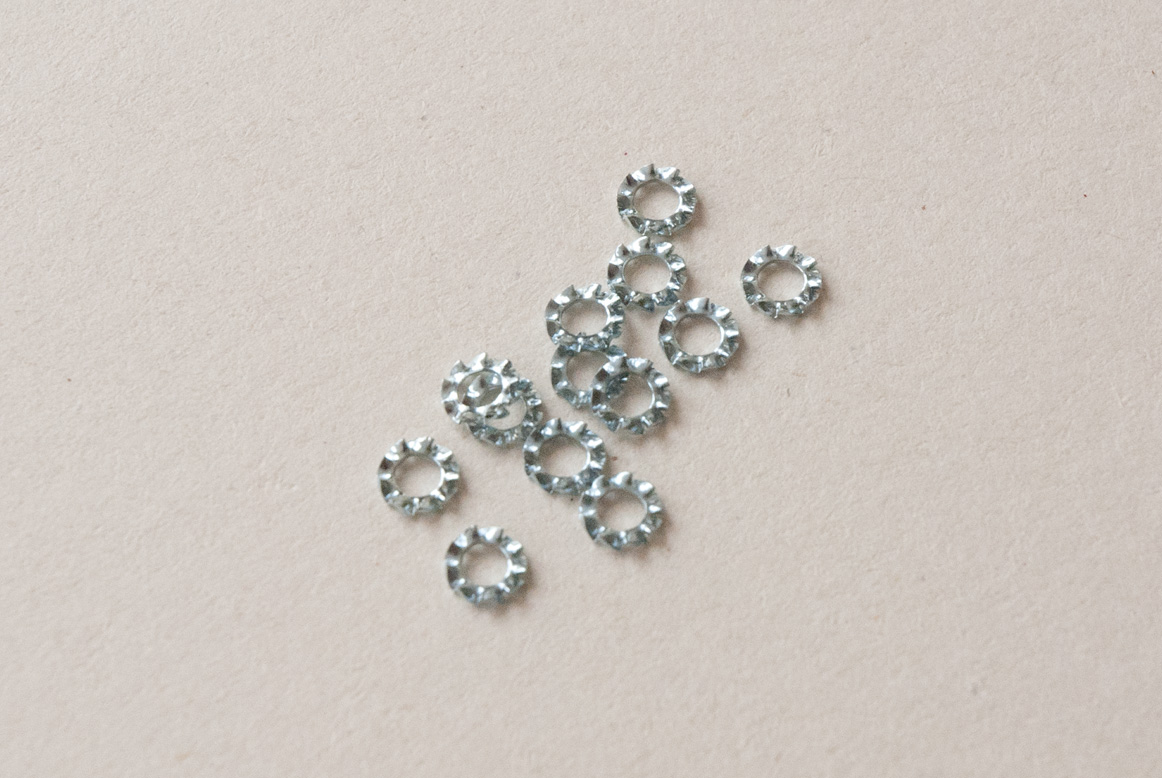
5 pcs. M3 Thooth Lock Washers
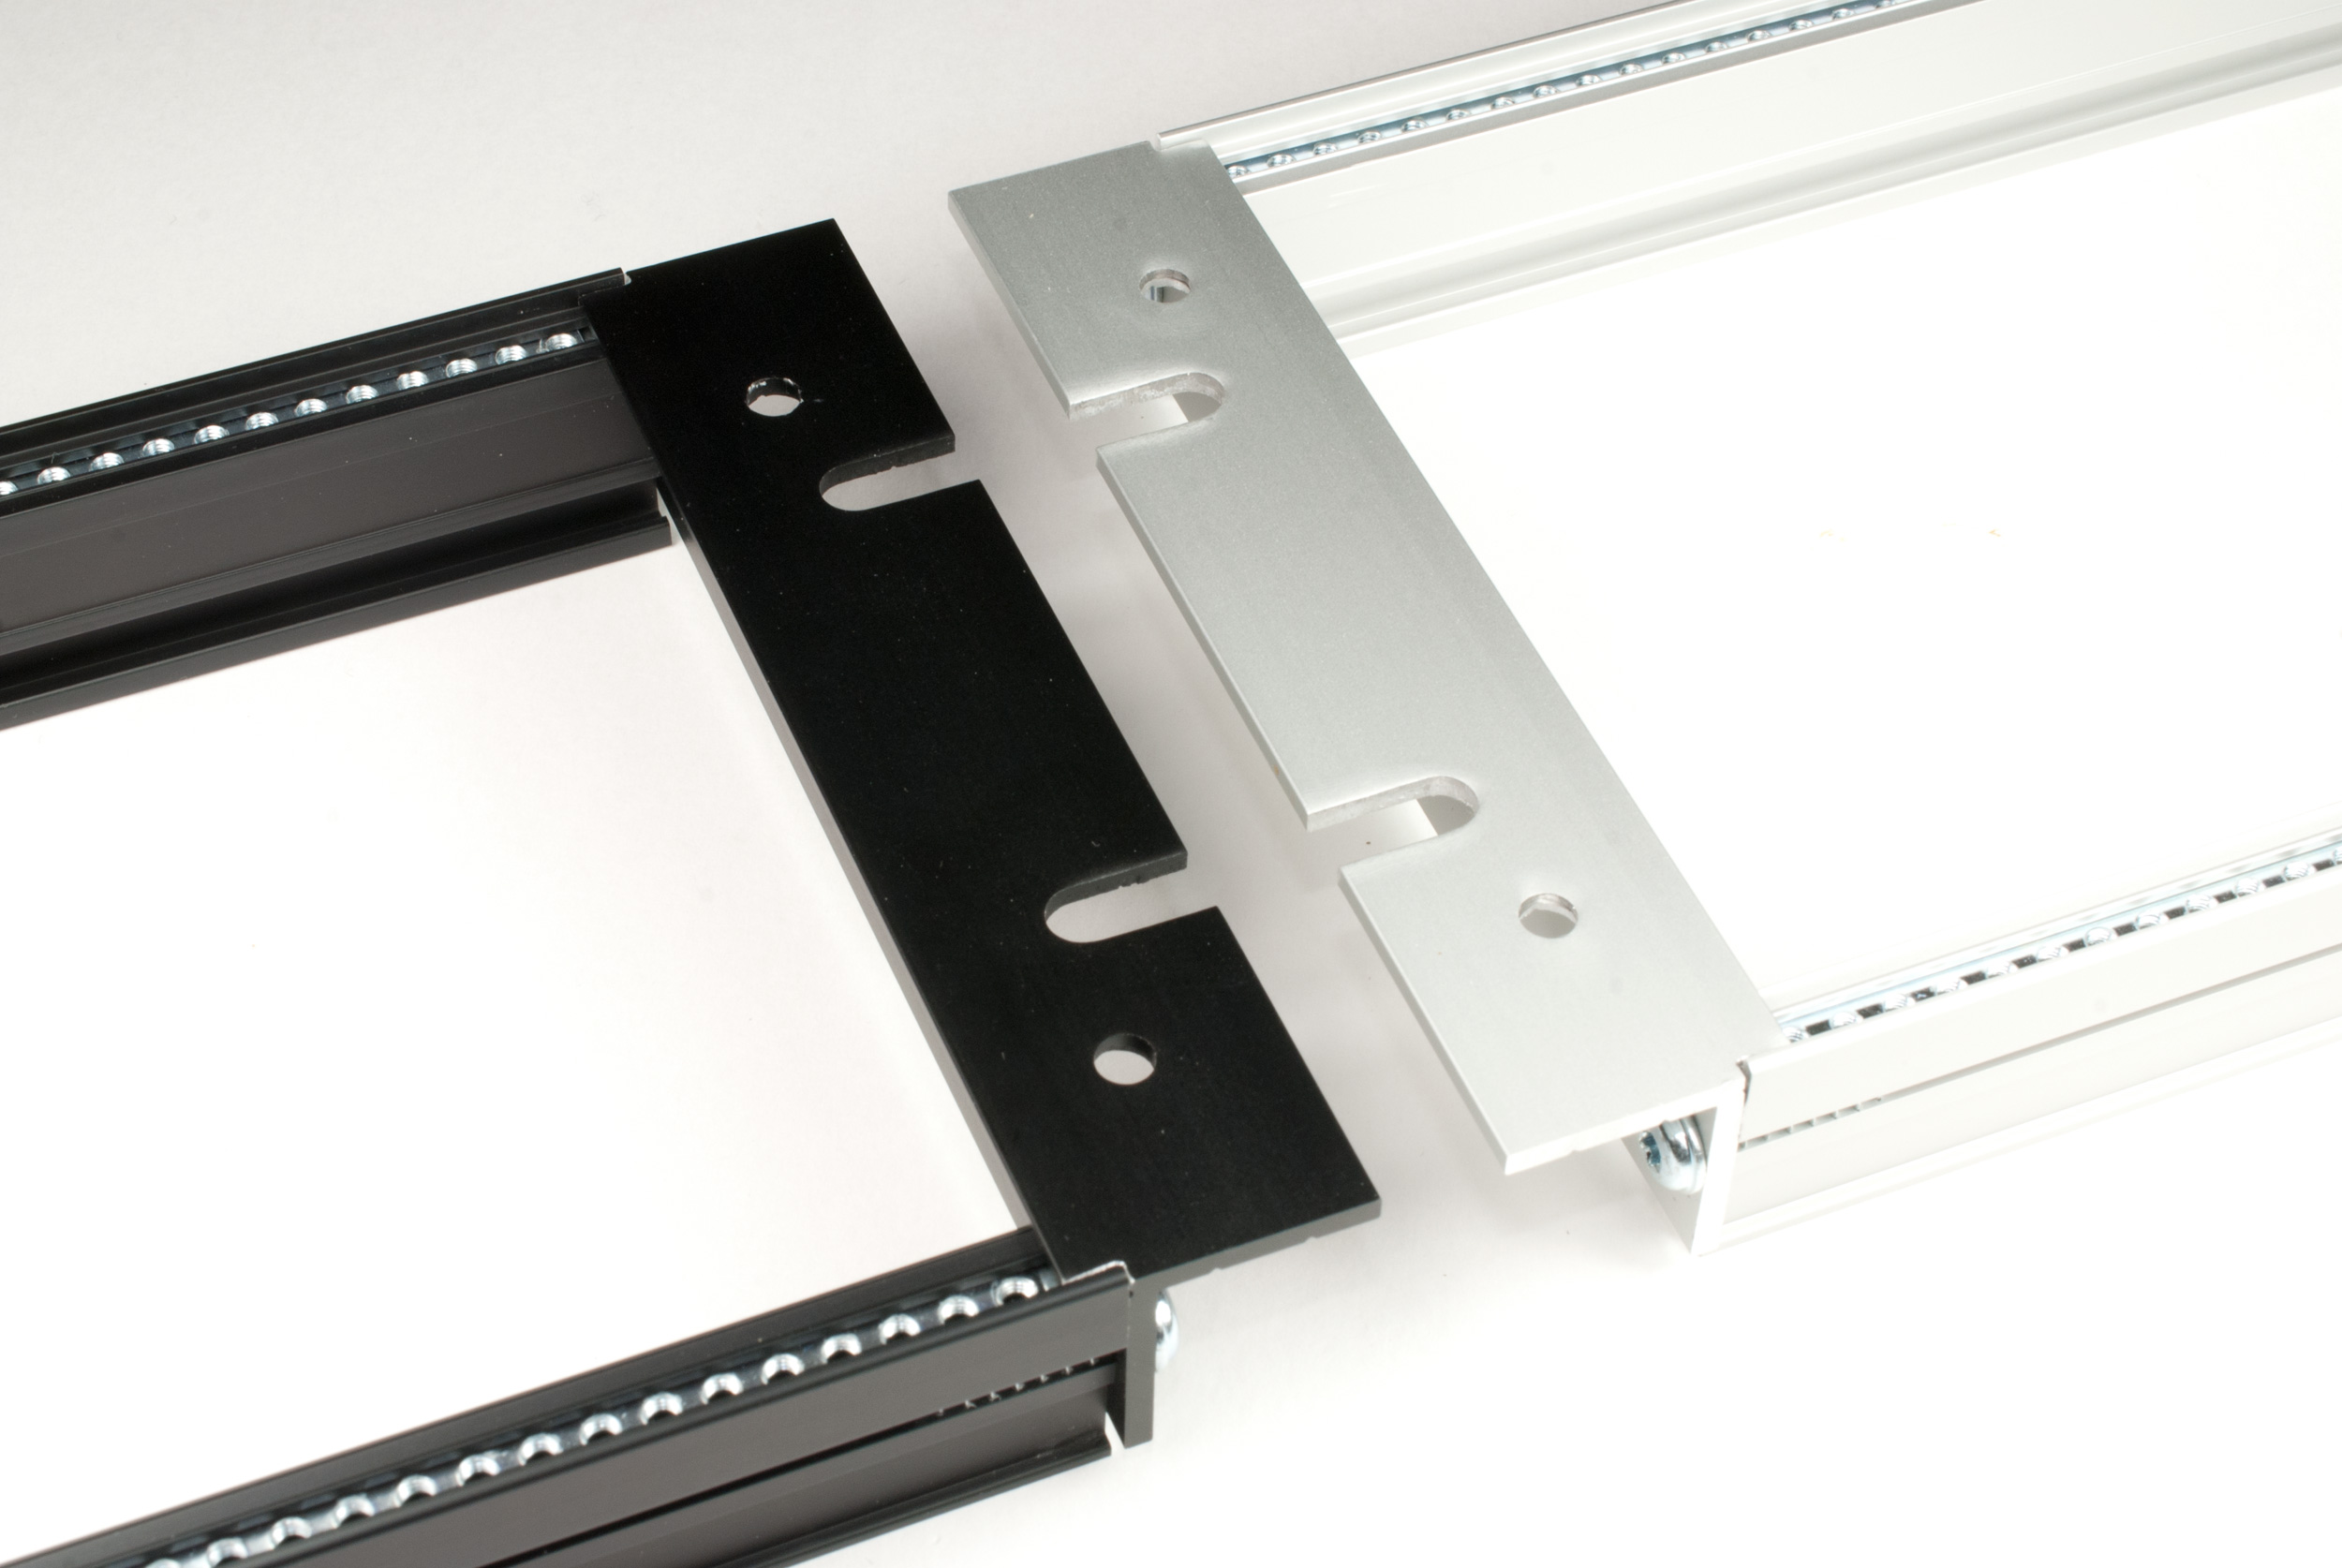
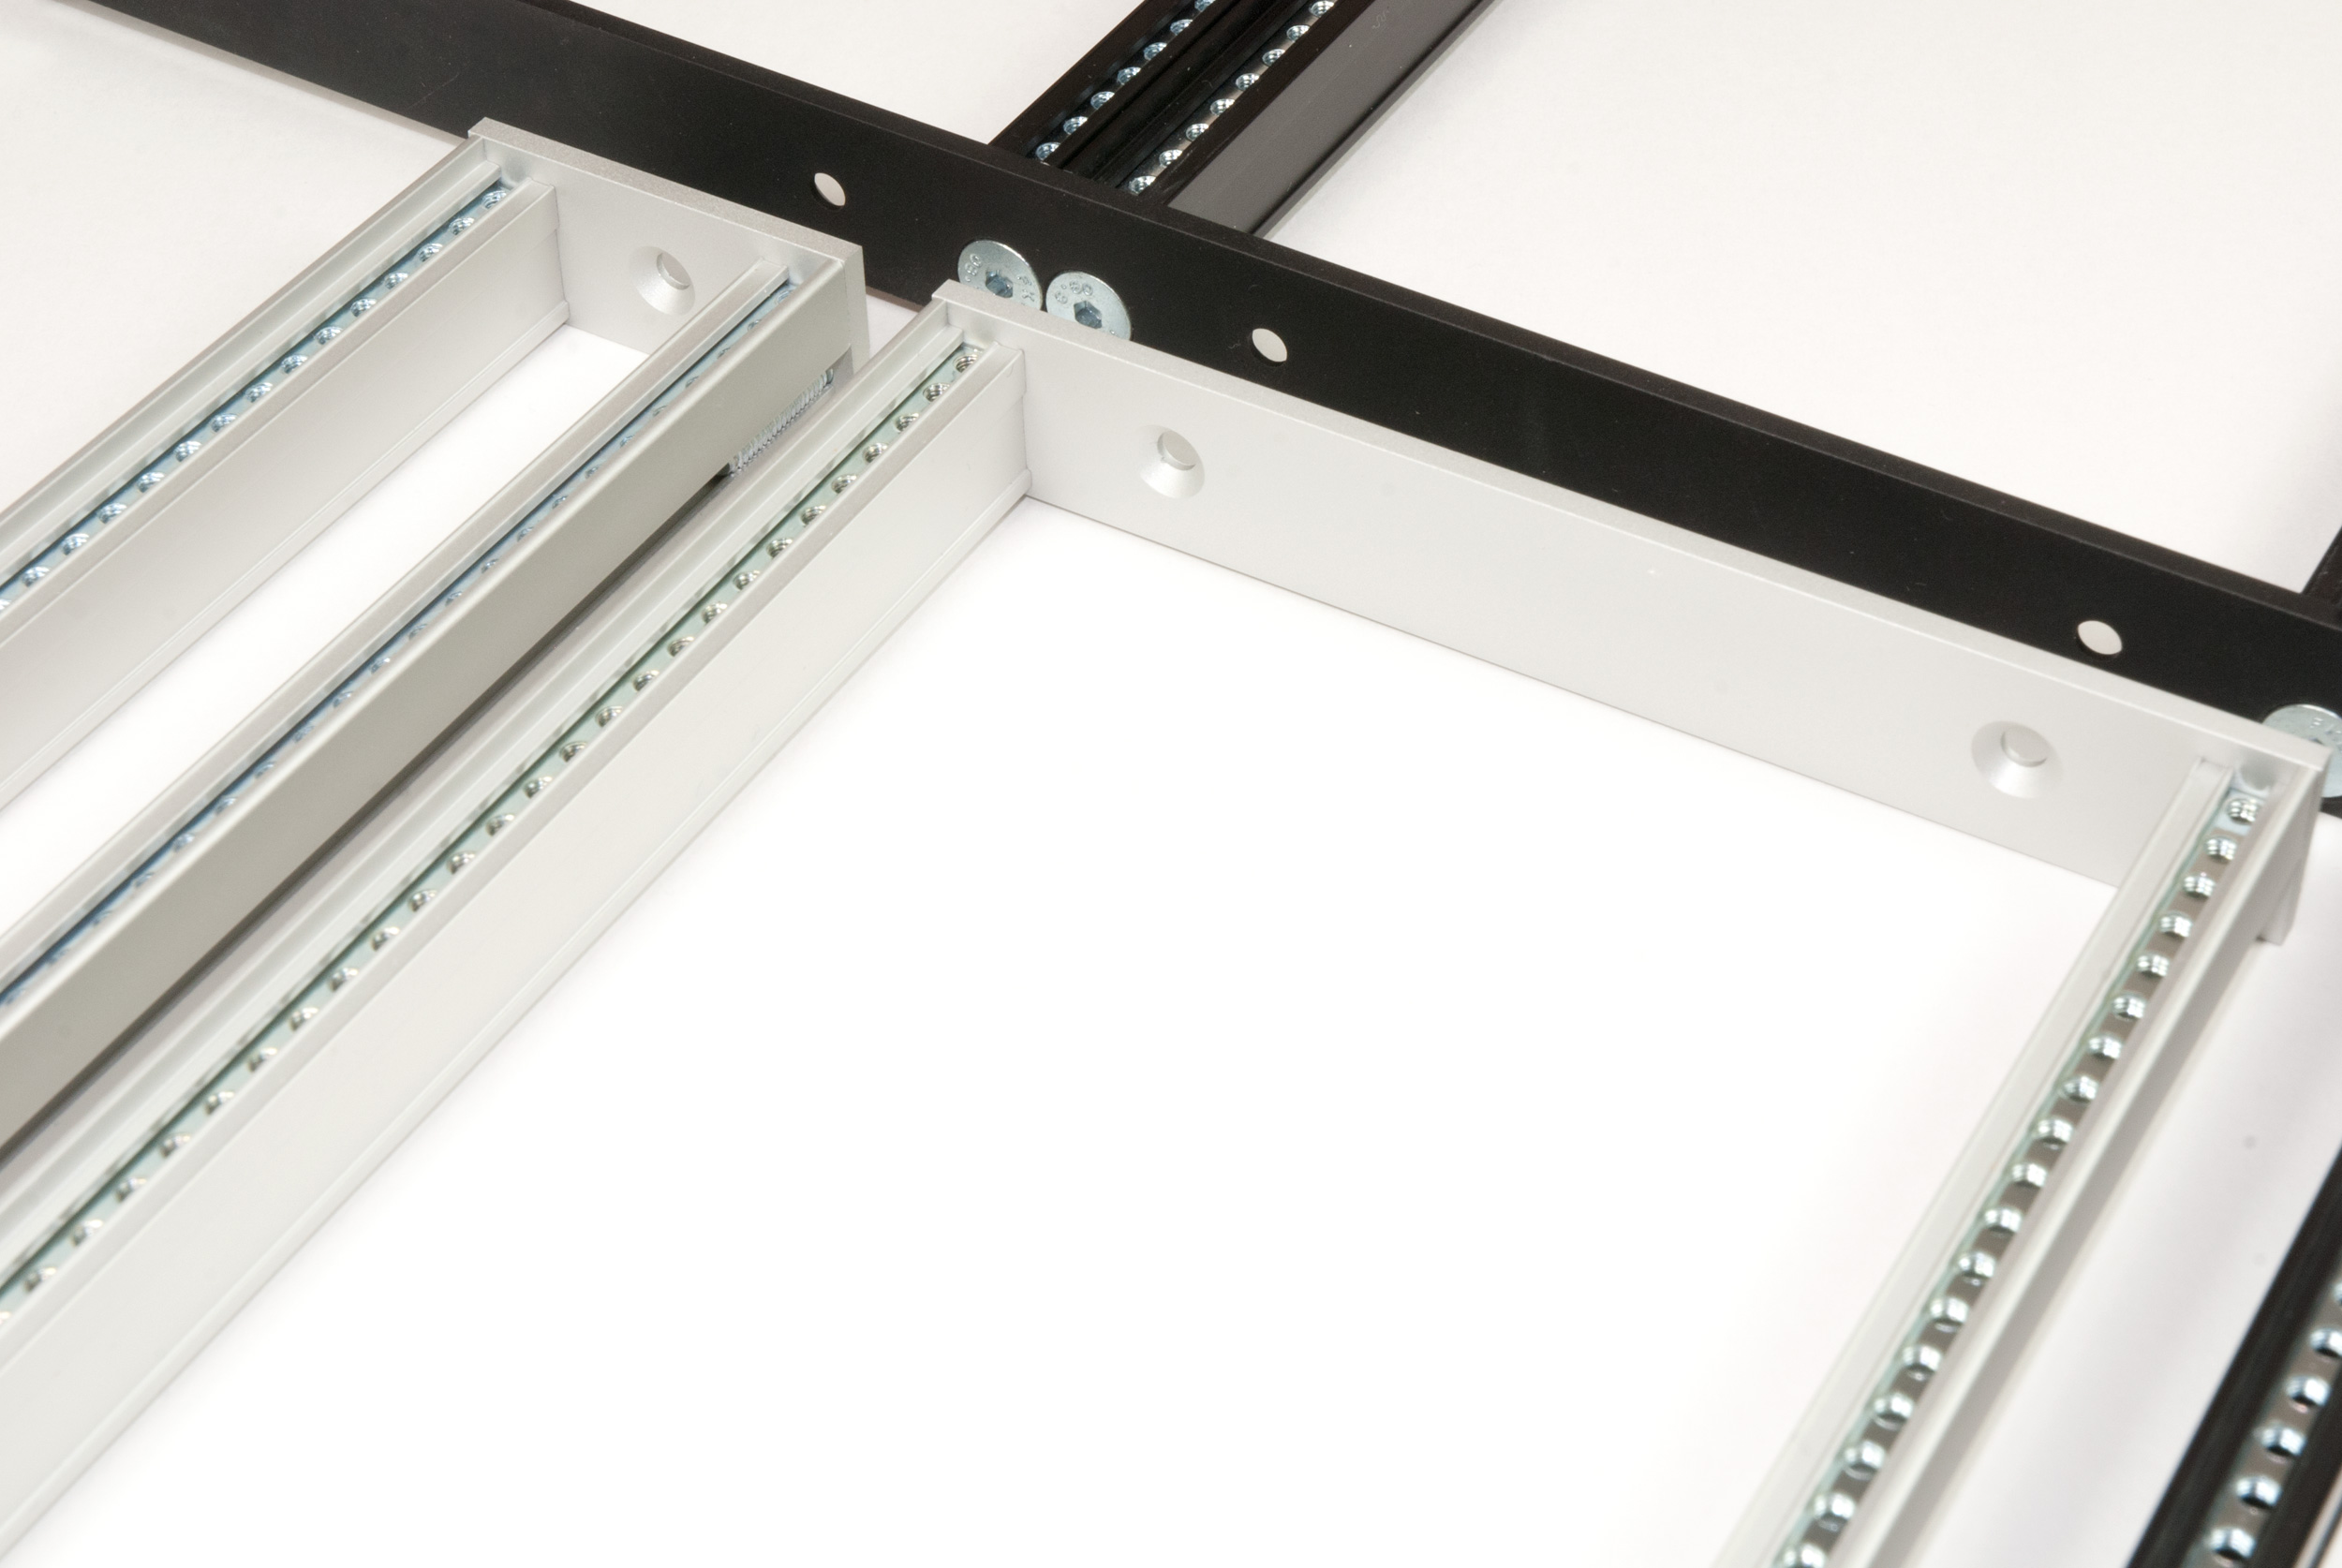
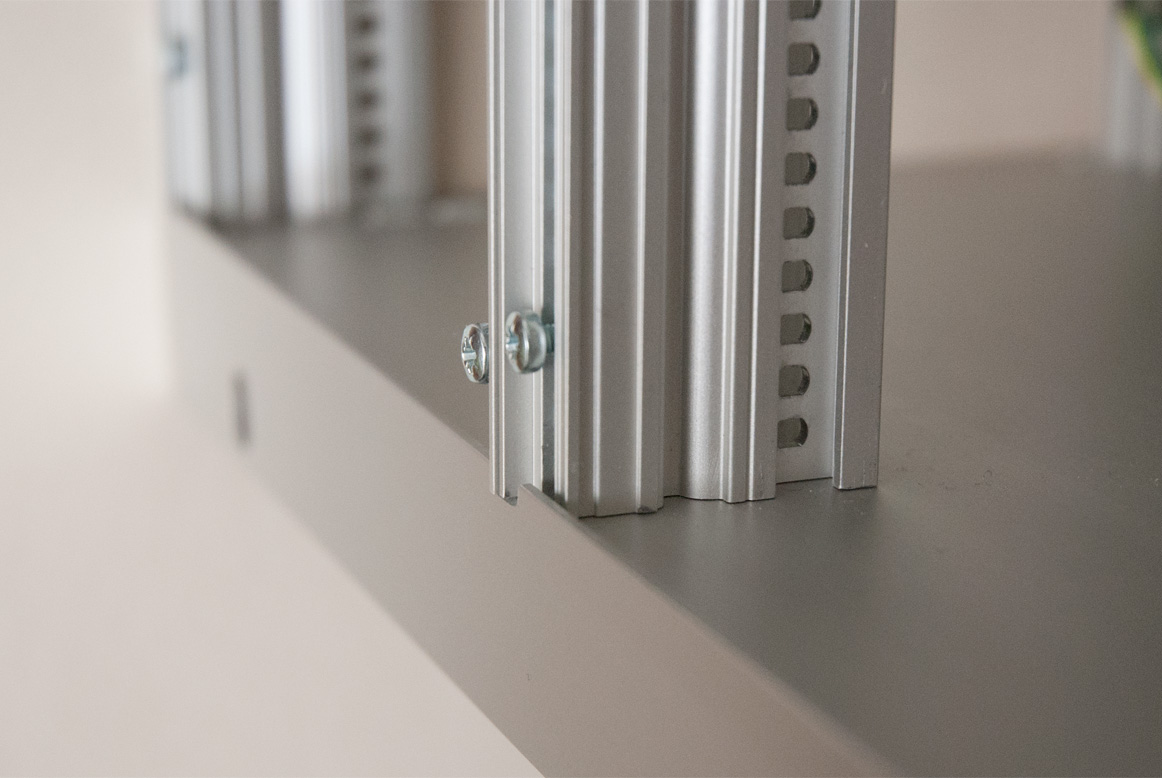
What really confused me when I started to build my first 19 inch rack was the width of the rails. To build a 19 inch rack with a usable width of 84HP (ca. 427 mm, exact 426.72 mm) you will need 85HP (432 mm, exact 431.8 mm) rails. The rack ears need 2,54 mm space on each side of the rack, as you can see on the following picture. Standard z-rail with rack ear, extending into the rail by 2.5mm
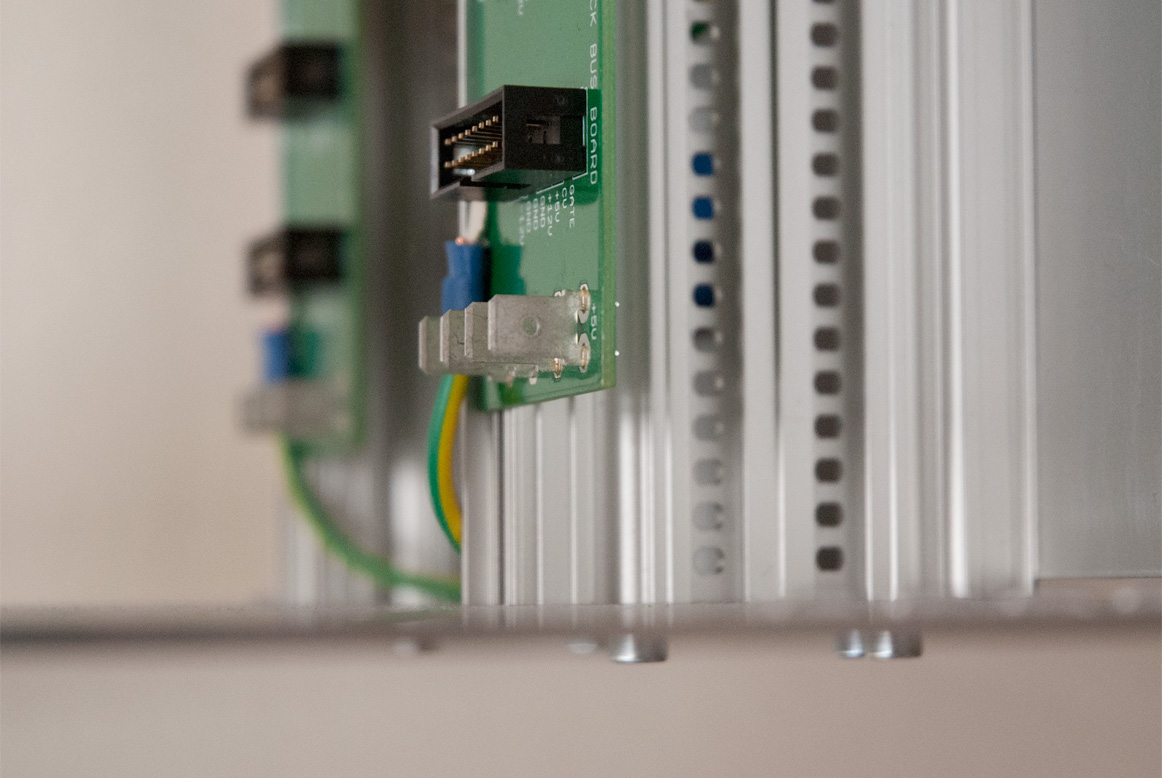
The busboards will be screwed on the two perforated rails using pan head screws, thooth look washers and square sliding nuts. Don’t worry, the part that is connected to the rail does not carry any contacts. So no risk of short circuit.
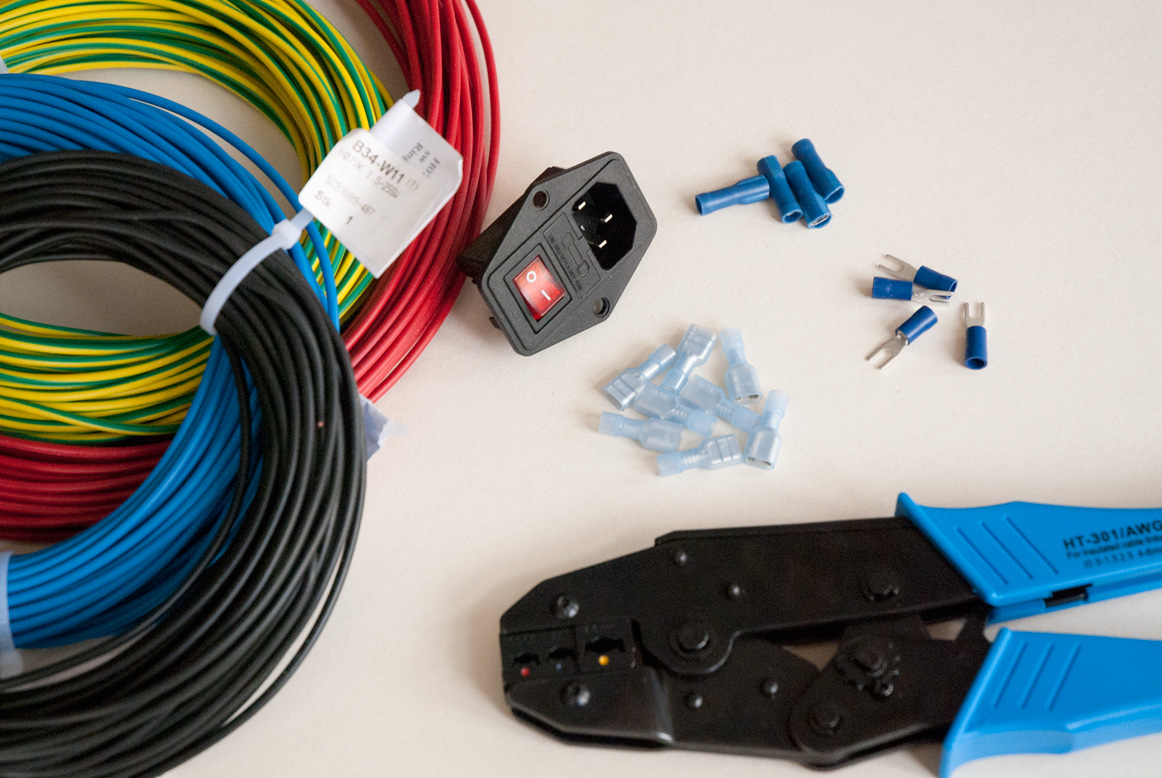
List of electrical components
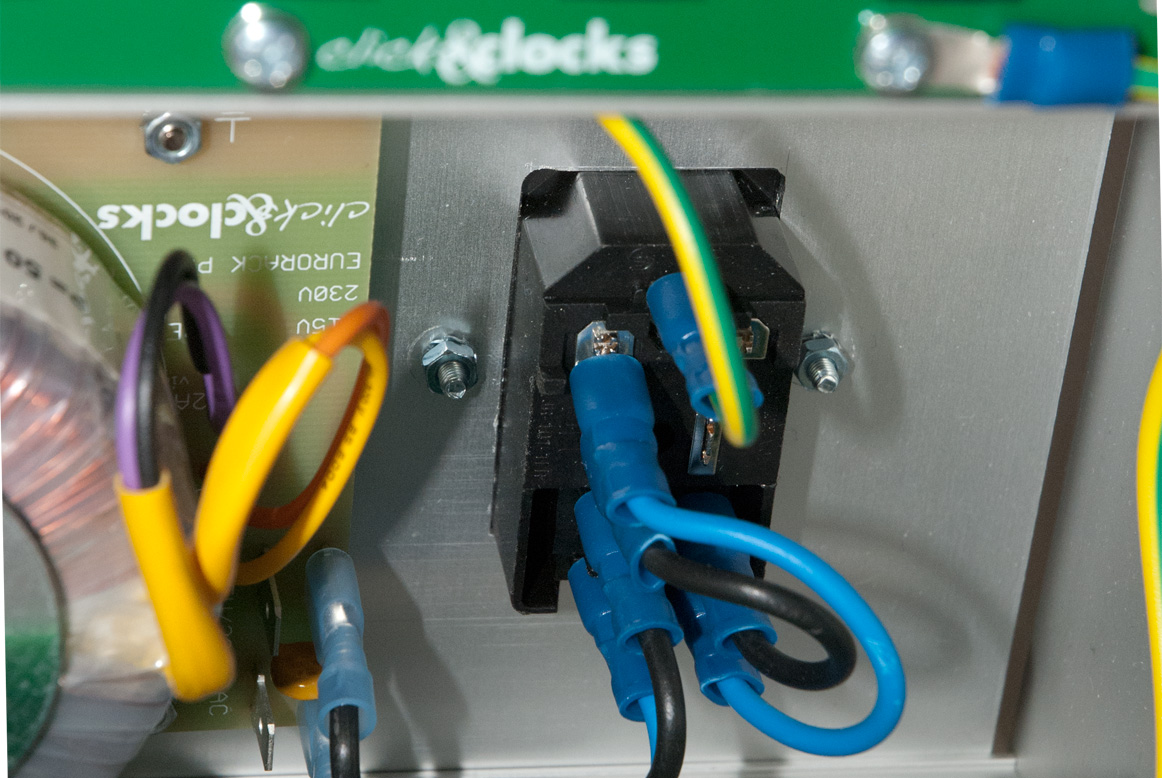
1 pcs. IEC 320 Mains inlet with fuse holder and switch
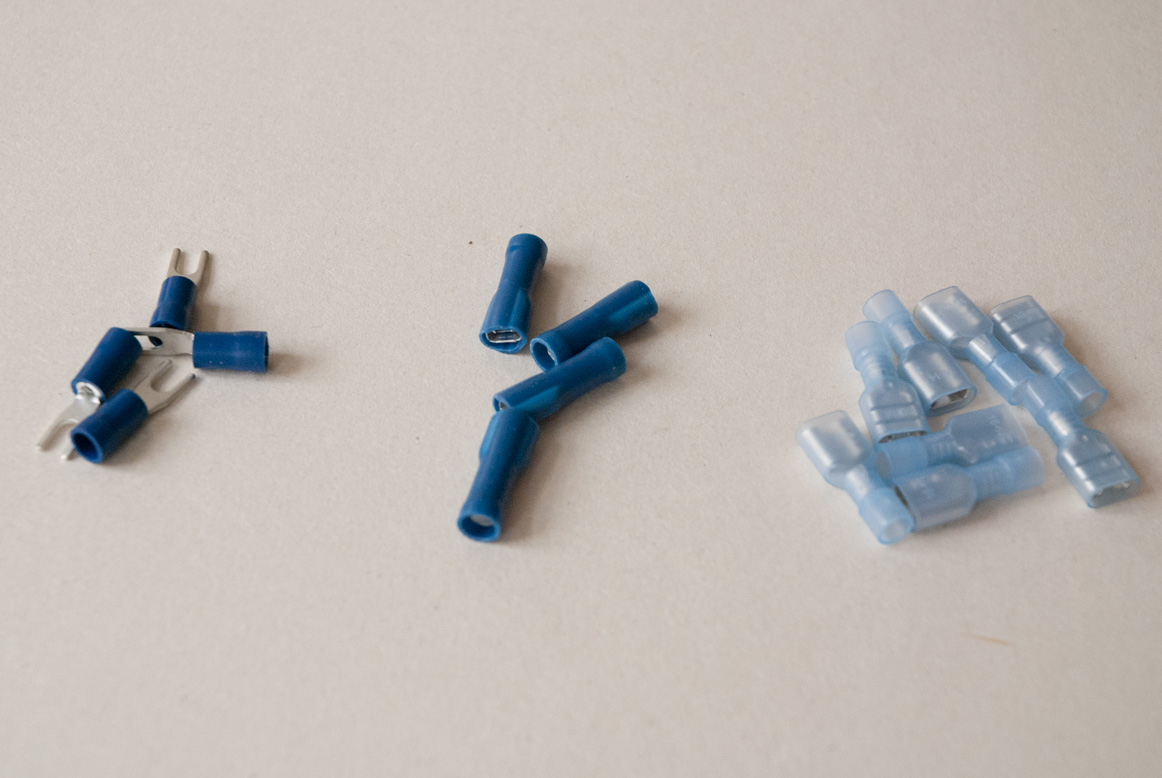
5 Fully Insulated Receptacles, 6.3 mm
10 Fully Insulated Receptacles, 4.8 mm
5 Insulated Fork Cable Lug
1 Micro Fuse, 230V – 400mA, time lag or slow blow
1m PVC Cabel for internal wiring, H05V-K or H07V-K, green-yellow
1m PVC Cabel for internal wiring, H05V-K or H07V-K, black or brown
1m PVC Cabel for internal wiring, H05V-K or H07V-K, blue
TECHNICAL DISCLAIMER: Please be aware that the power supply carries mains voltage (115 or 230 V AC). According to the safety rules the installation has to be done by qualified personnel only. Please keep that in mind: Danger to Life!
This is a private blog, and it is about sharing experiences. No warranty at all.
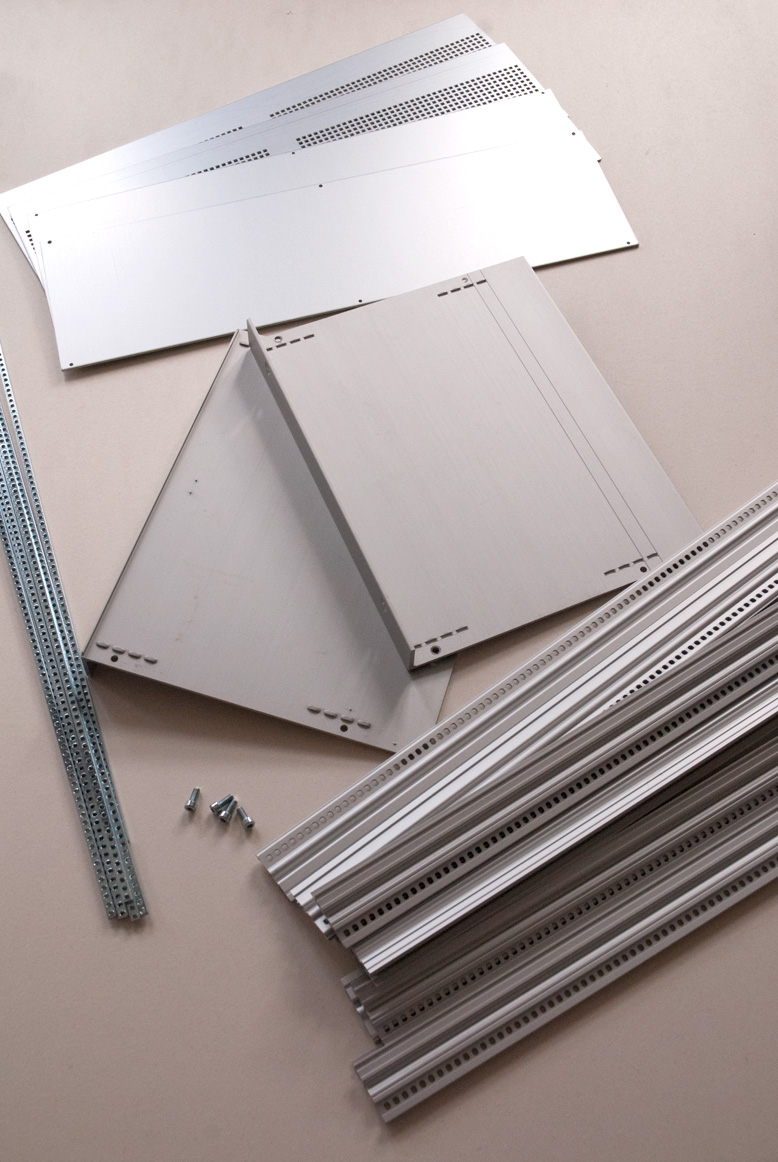
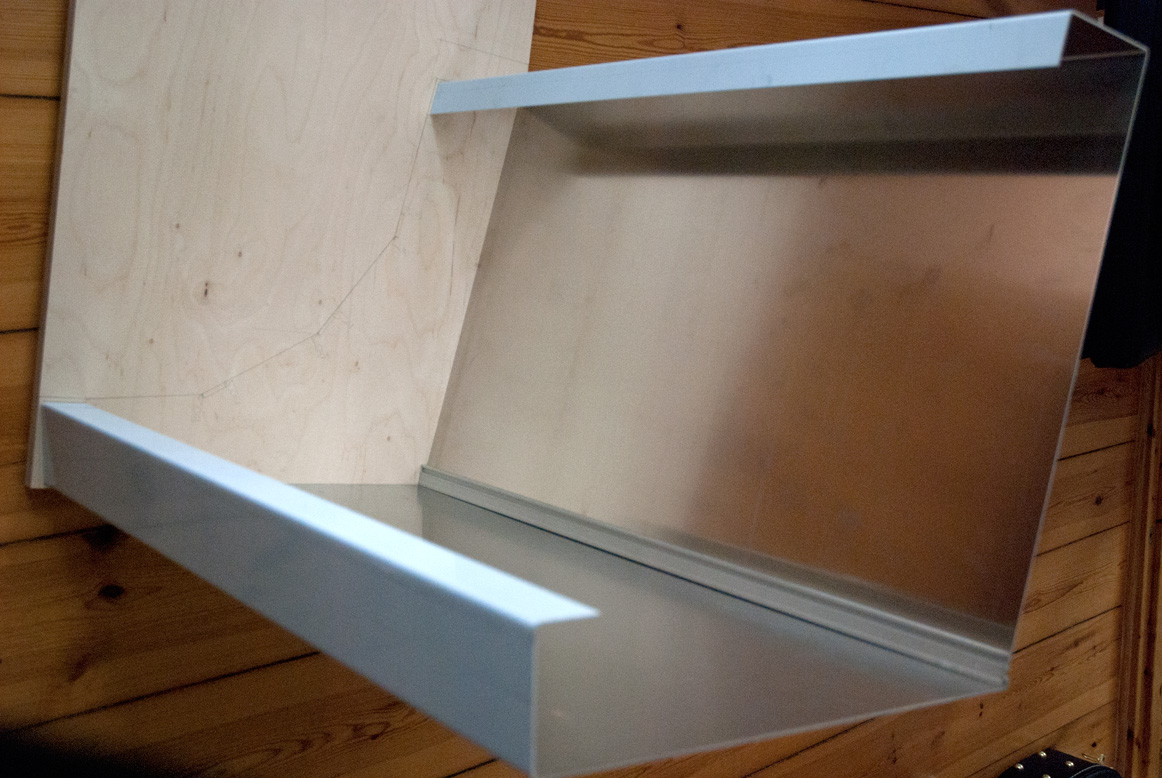
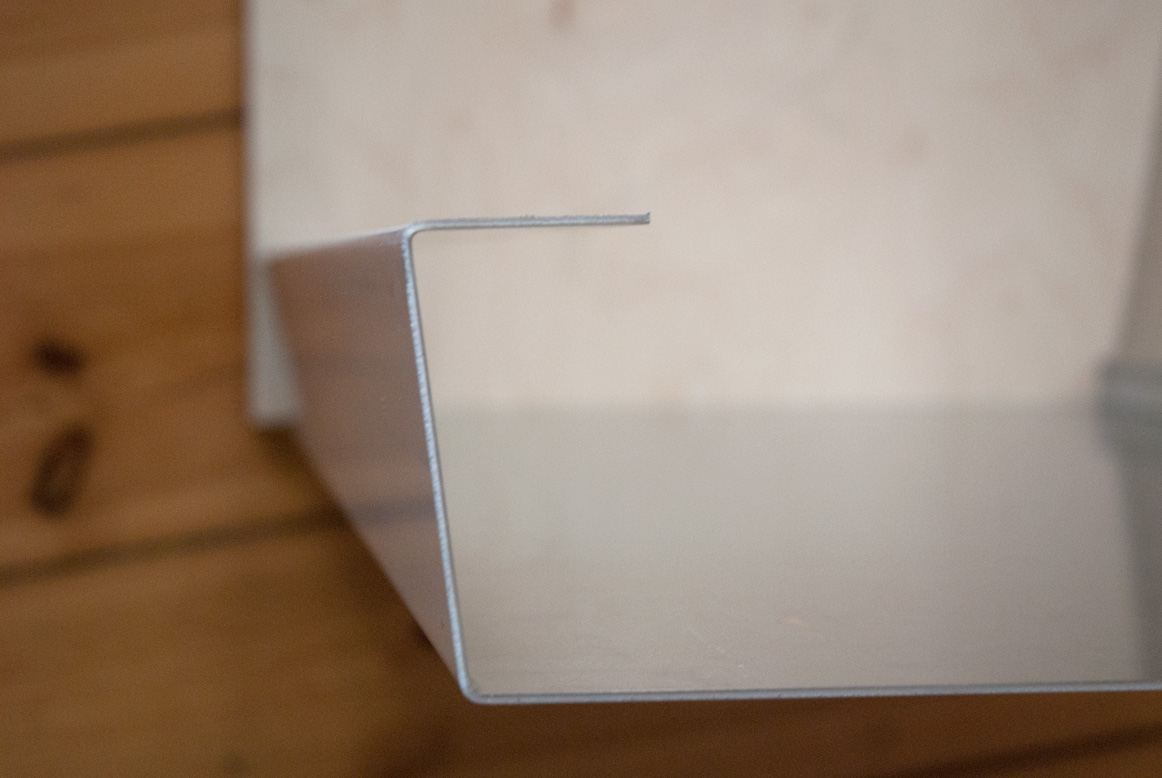
This was a major step. Today I got the bottom and rear panels bended. Two main parts of my case construction, which I couldn’t do on my own.
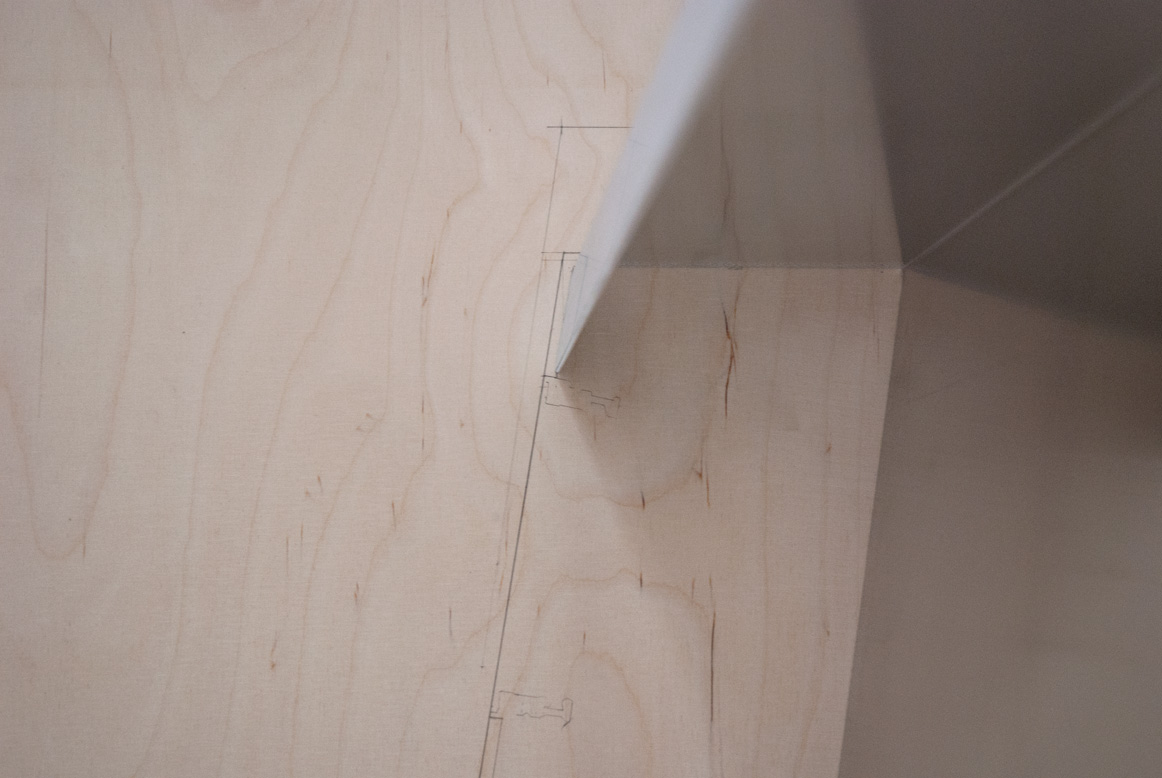
The idea of the case construction is to fix the rear and bottom panels with threaded rods between to wooden side wings. Next up I have to drill several holes to fix the busboards and and PSUs on the panels. The hole for mains inlet with switch and fuse holder needs to be routed. Once the metal work is done the panels will be powder-coated.
Some sketches of the case to visualize the construction. The other main components of the construction are the wooden side wings. These need to be drilled, routed and sanded before they finally get an oil finish. That’s the rough plan for the next weeks.
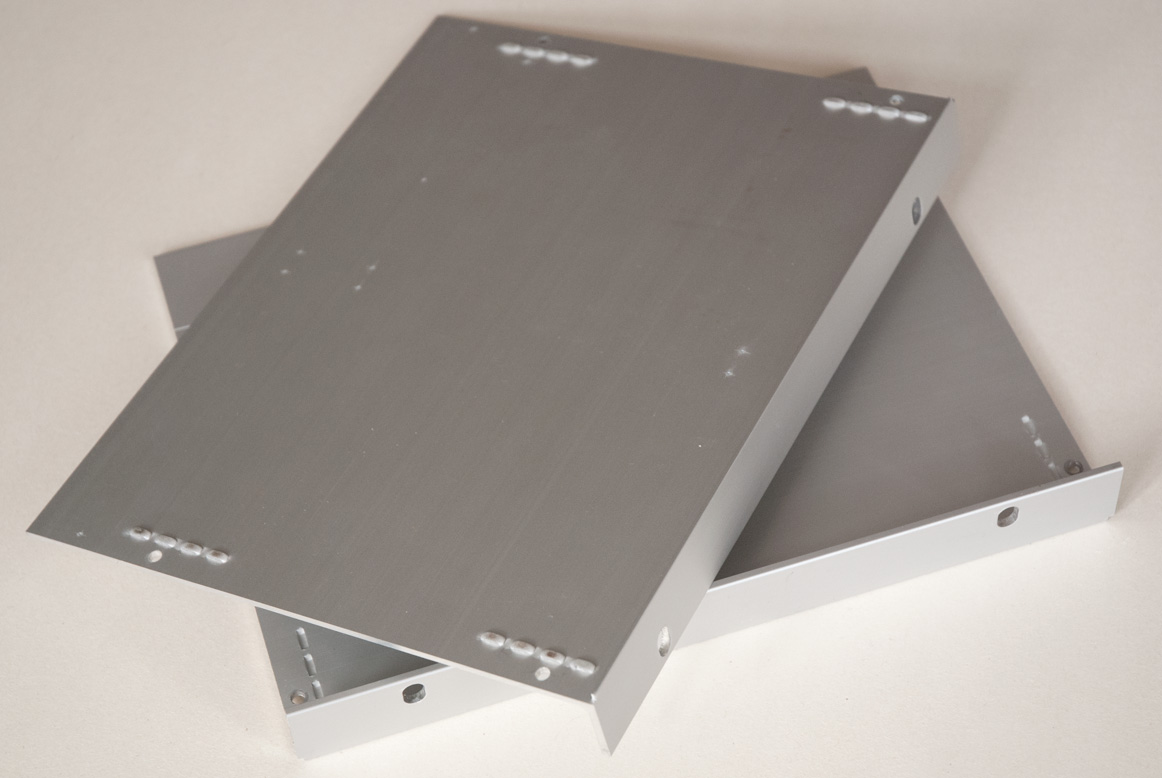
Some pictures of panels:
Eurorack console case panels view from the side
Eurorack console case panels inside view
Eurorack console case rear and bottom panels connection
Eurorack console case bottom panel detail front
Eurorack console case bottom panel inside detail
Eurorack console case bottom panel inside
Eurorack console case rear panels side wing
Eurorack console case rear panels side wing
Eurorack console case rear panel top detail
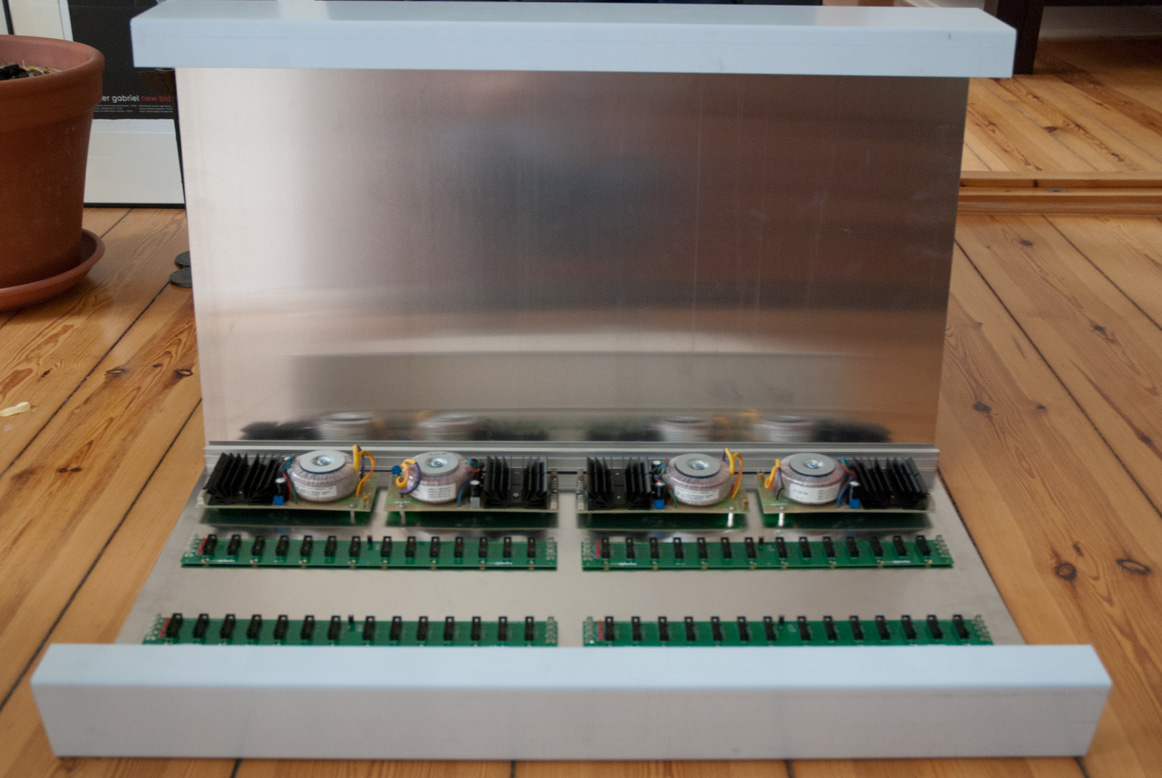
Eurorack console case panels components arrangement
Eurorack console case components arrangement total
If you want to read the full story, here are all the posts:
Basic set to start your own case project:
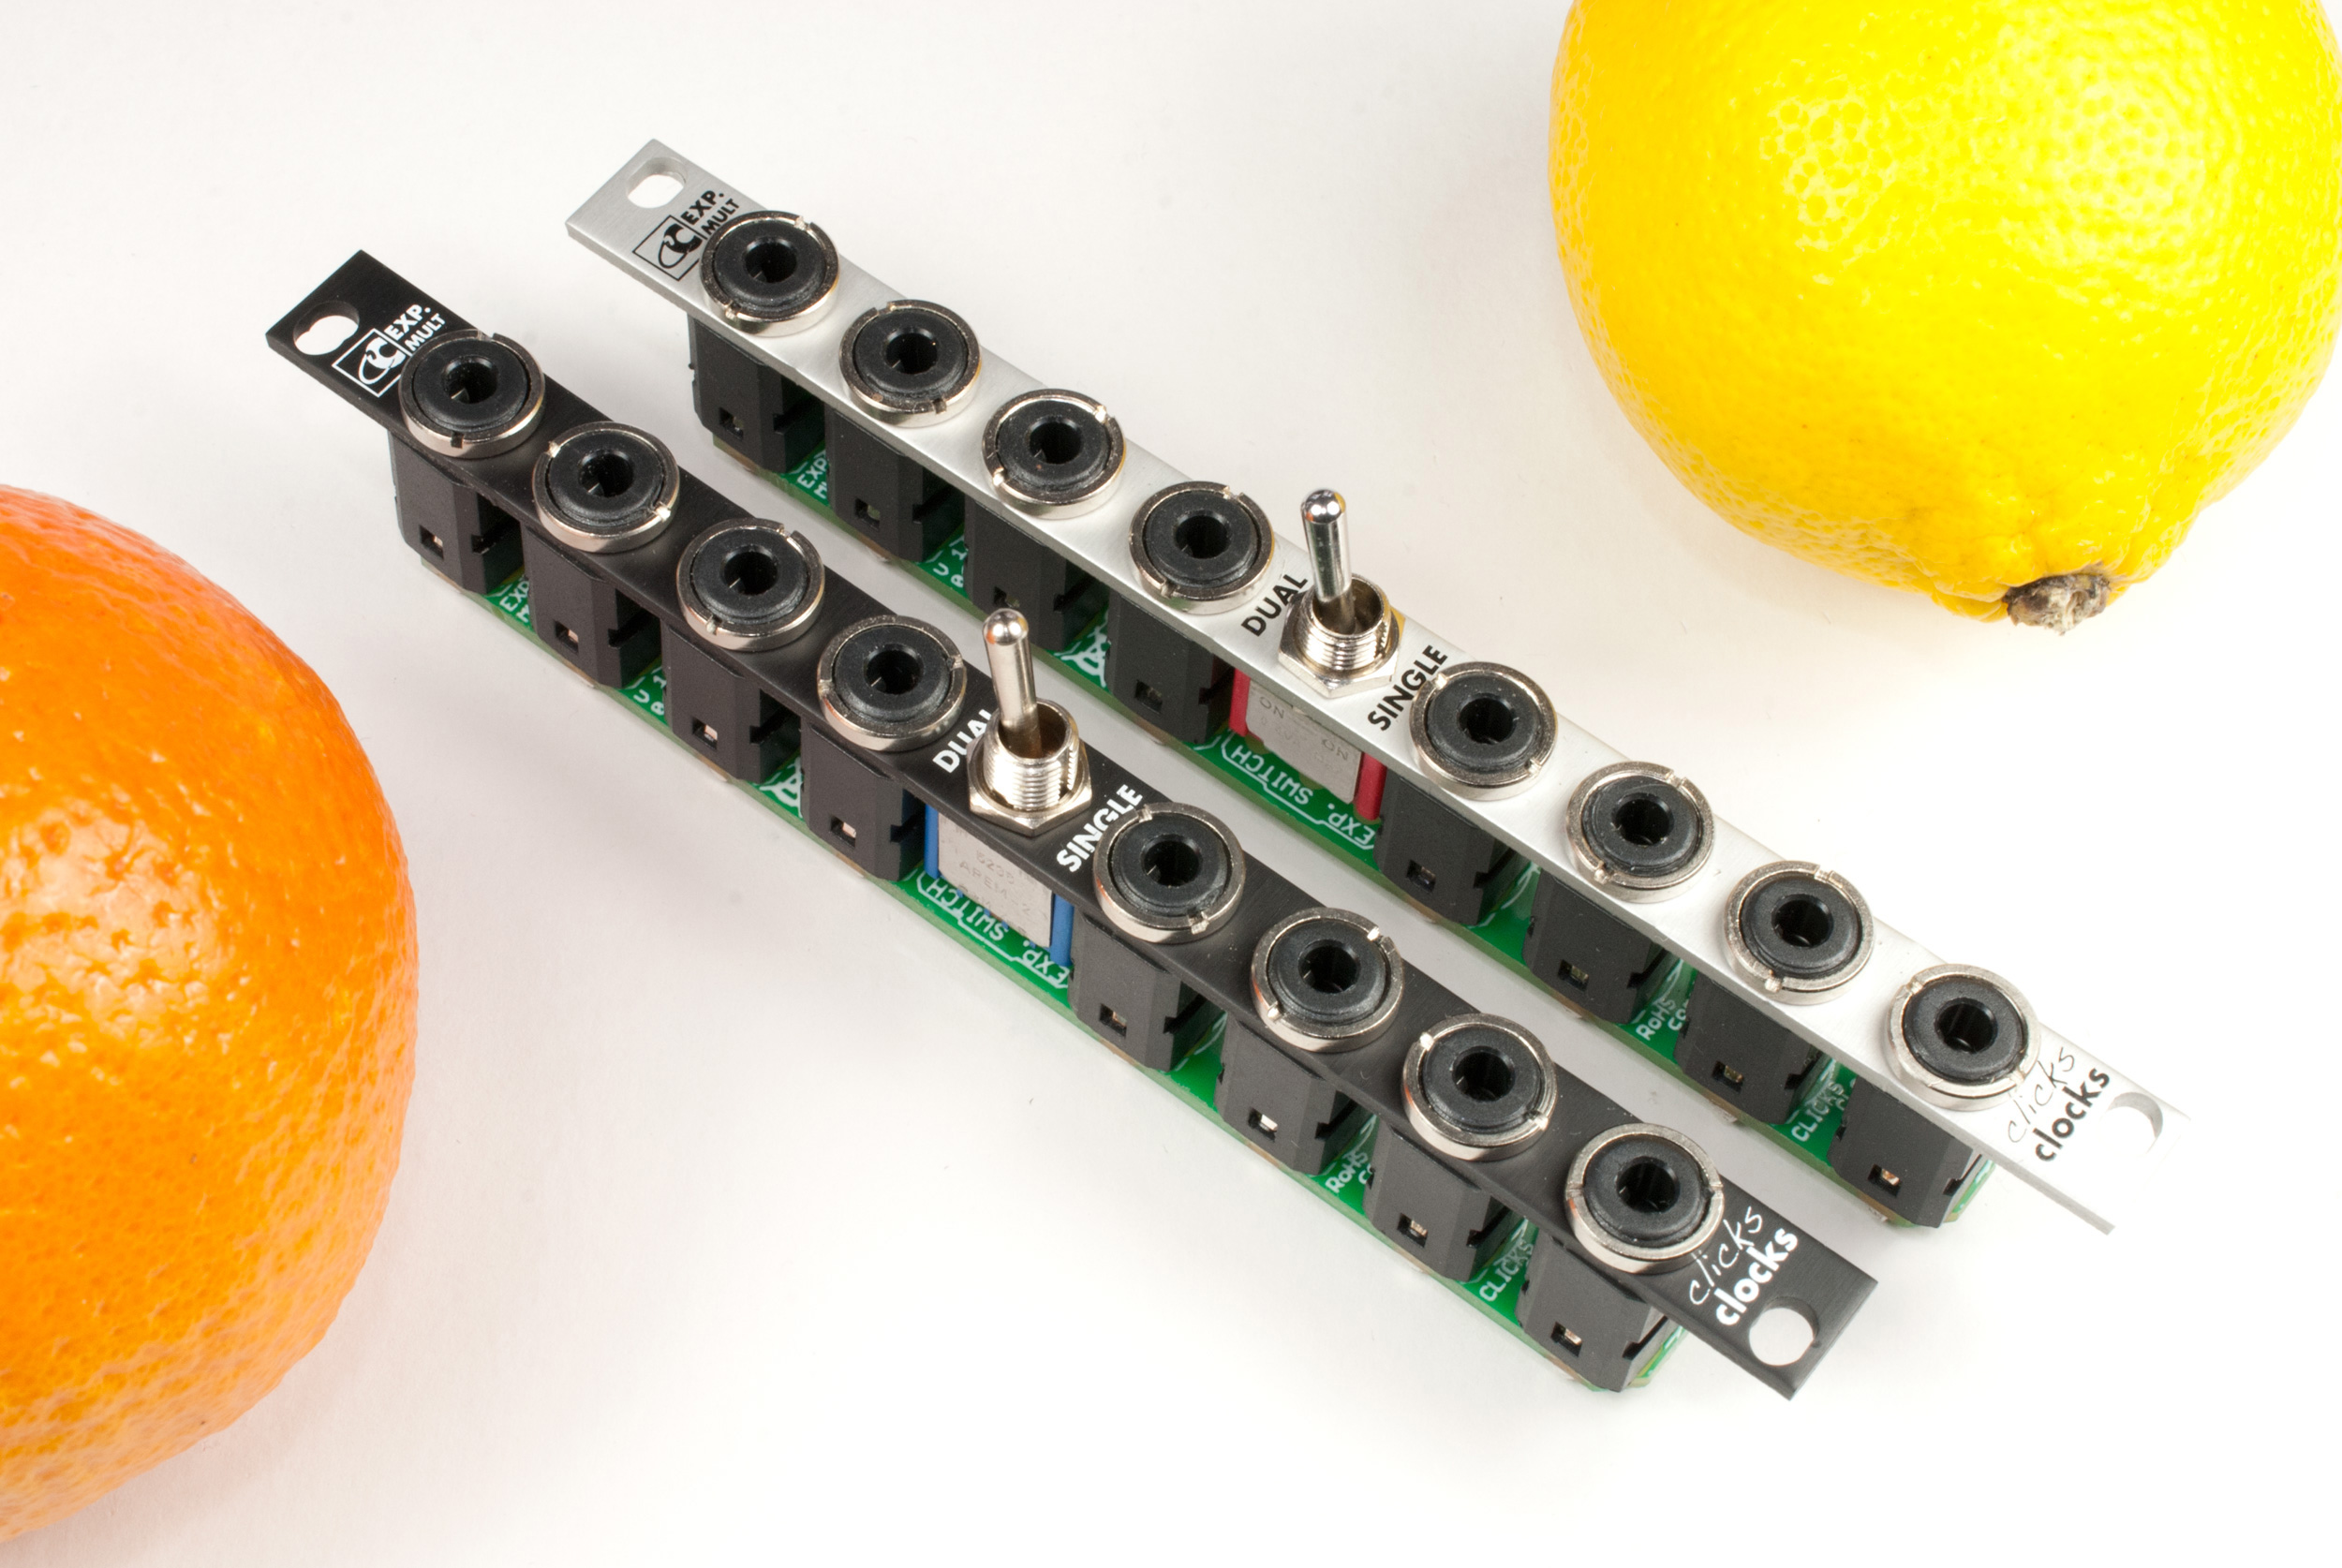
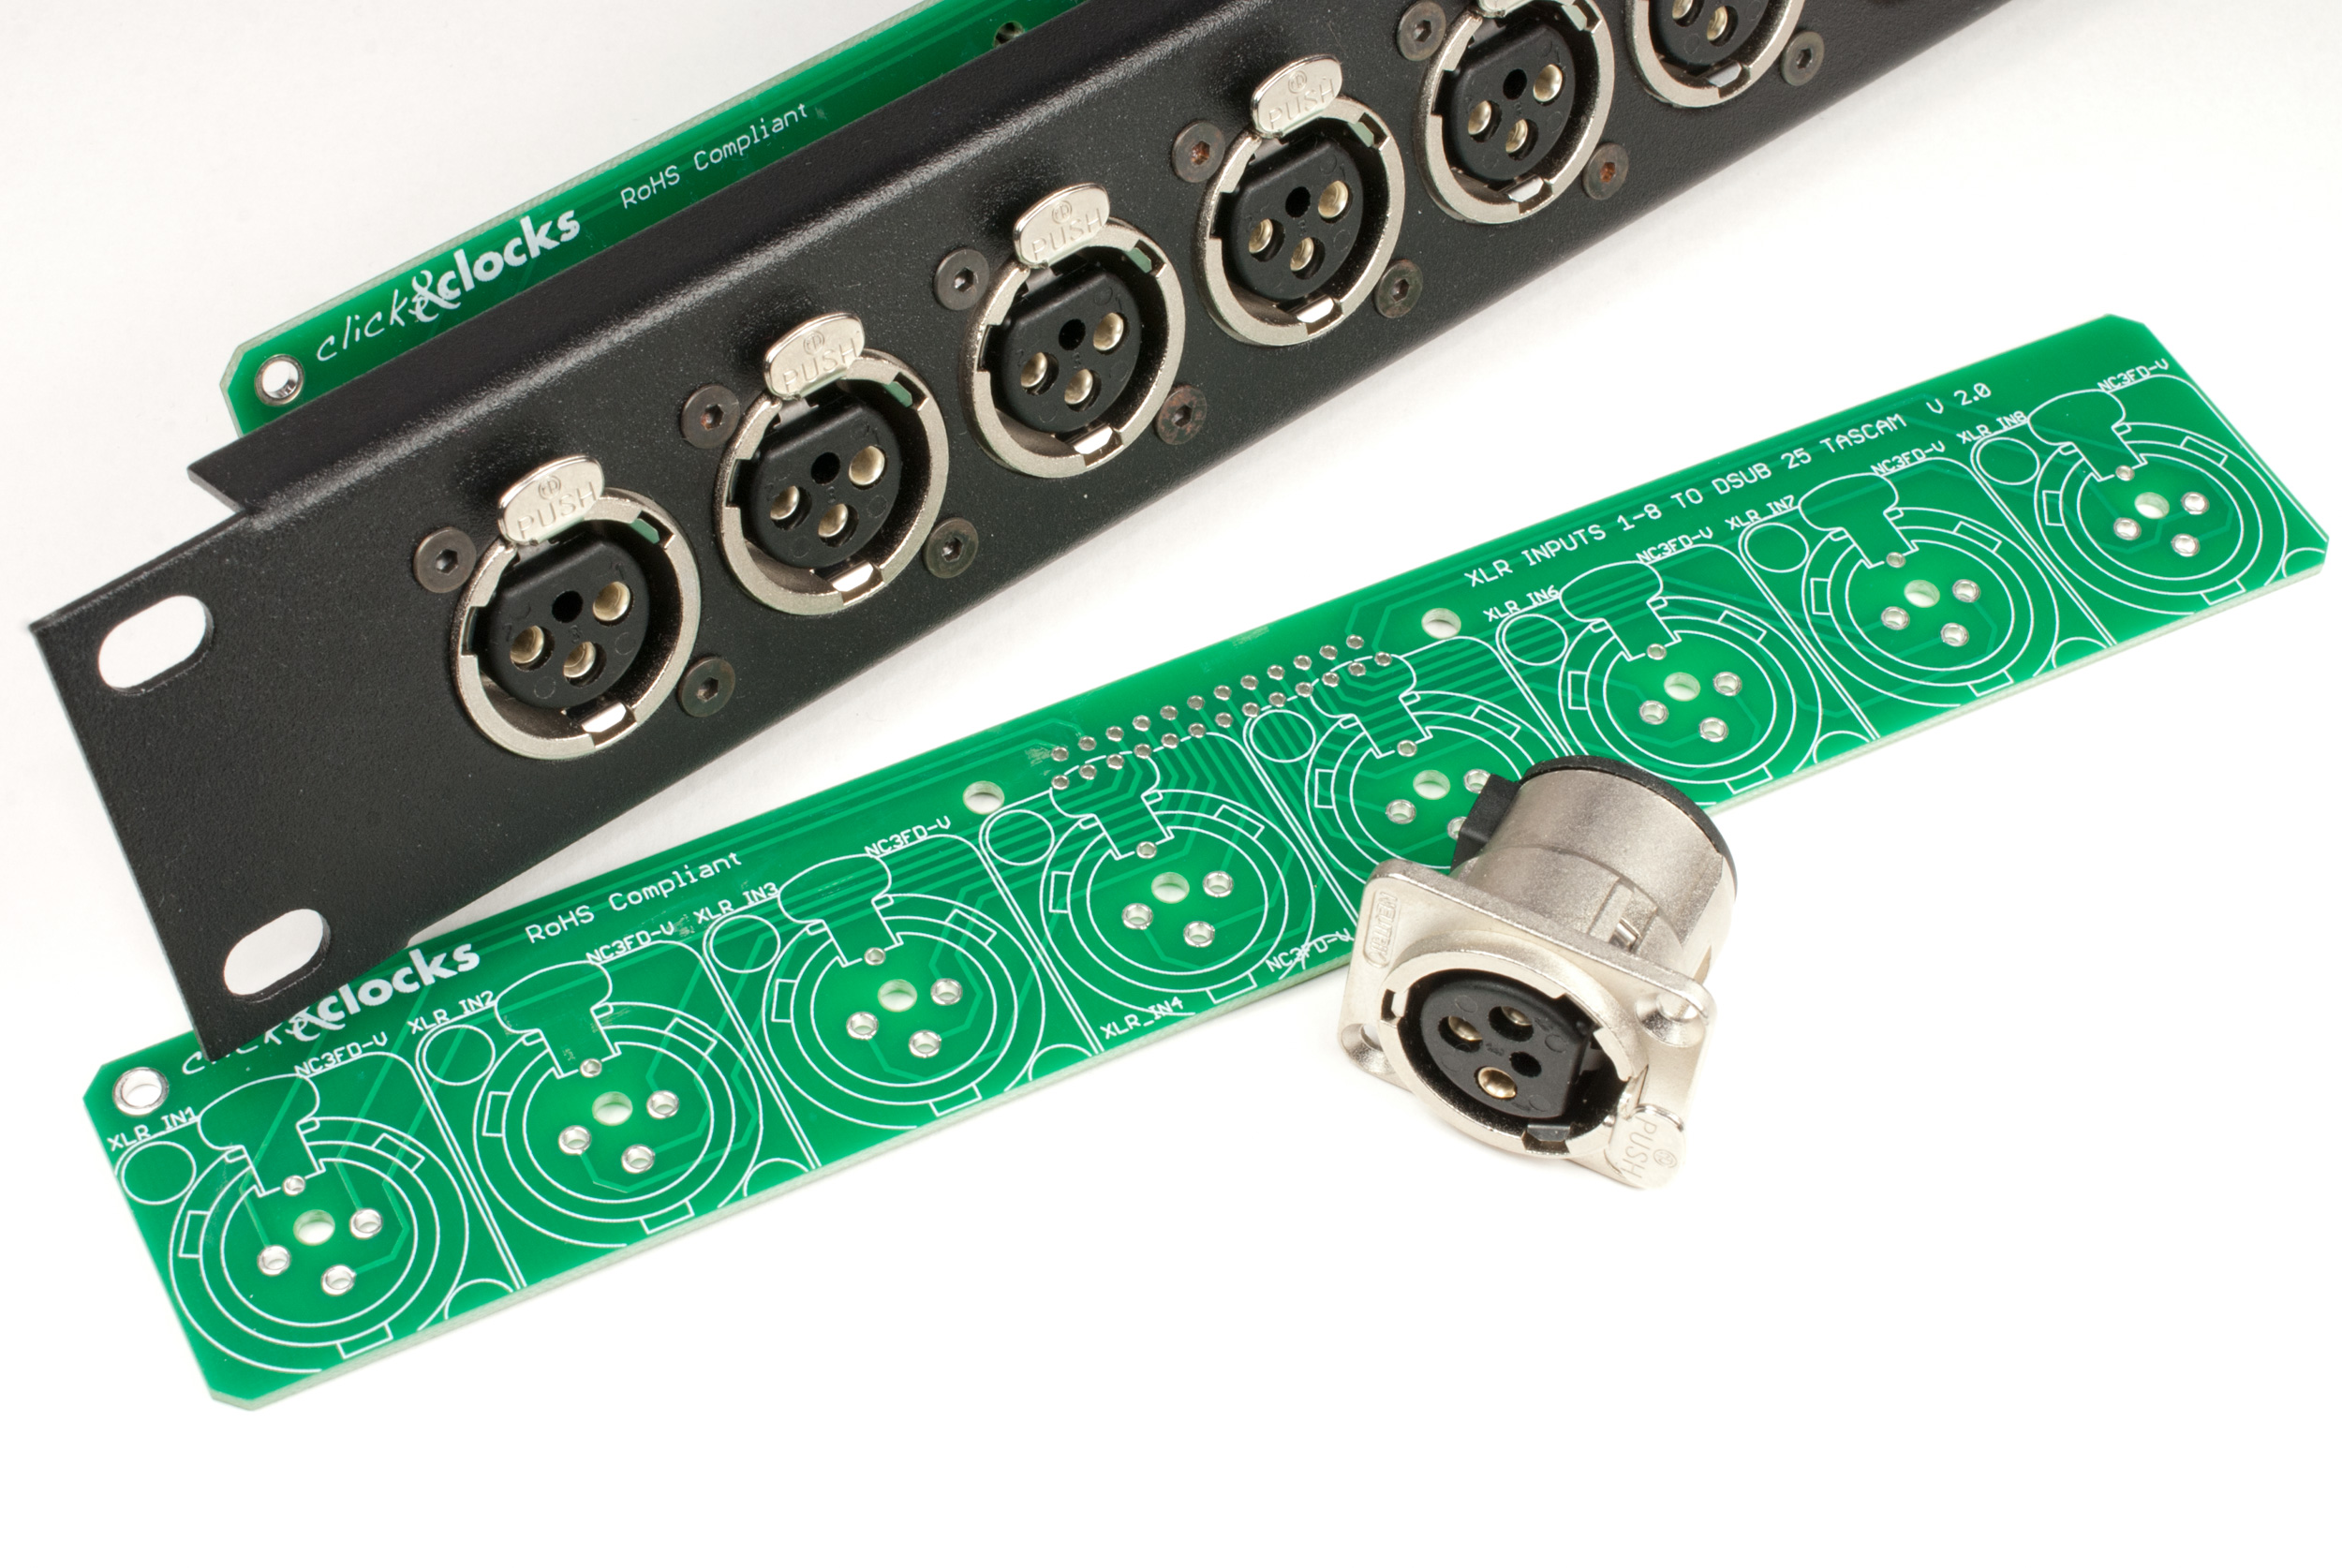
1 Clicks and Clocks PSU, +/-12 V/1200 mA, 230 V or 115 V
2 Clicks and Clocks Busboards plus cables for connection with the PSU
4 Z-Rails, 84HP length, plus sliding nuts (threaded strips optional) and screws to fix the rails Basic set to build your own Eurorack modular synth case
Set for a 19 inch/3U rack frame:
2 rails, 85HP length (84HP when mounted with the rack ears)
2 rack ears, 3U
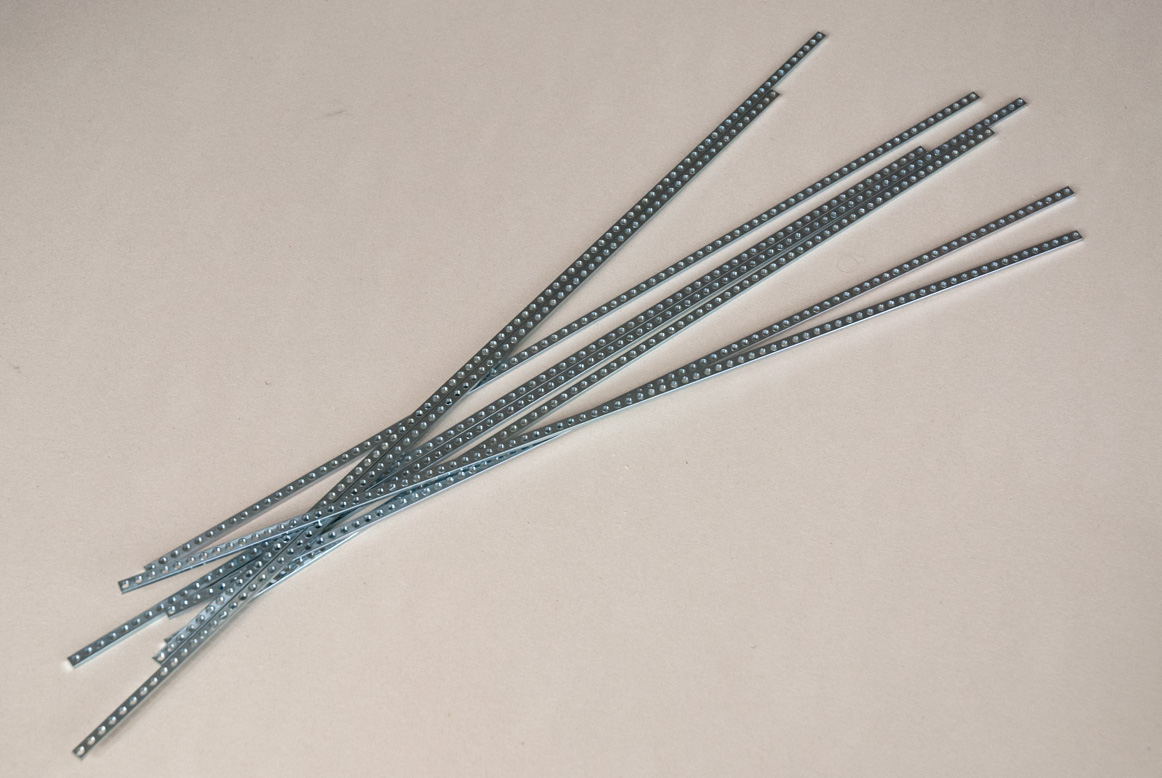
2 threaded strips DIY Eurorack – 19 inch case set
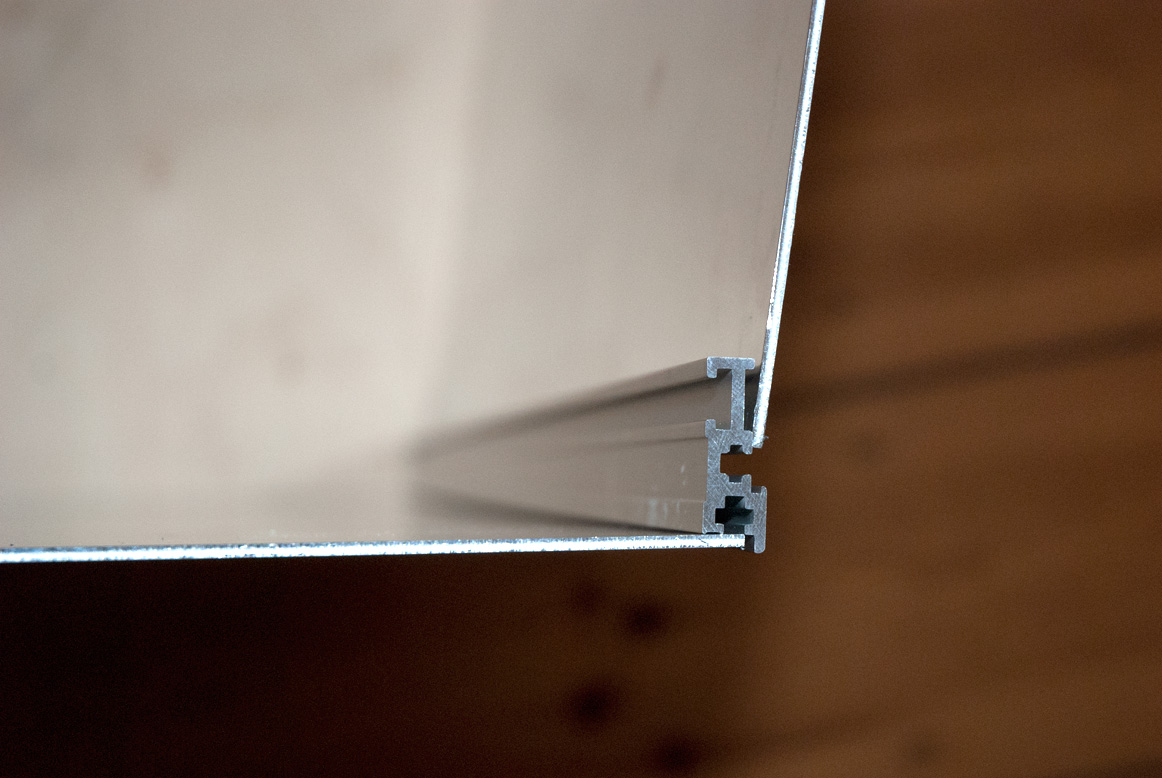
Some detailed images M3 threaded strip
Rack ear, 3U heightRail detail, 84HP
TECHNICAL DISCLAIMER: Please be aware that the power supply carries mains voltage (115 or 230 V AC). According to the safety rules the installation has to be done by qualified personnel only. Please keep that in mind: Danger to Life!
This is a private blog, and it is about sharing experiences. No warranty at all.
Starting the detailed planning of the case for my modular Eurorack synth.
After spending a few month on creating my own Doepfer like Clicks and Clocks Eurorack power supplies (PSU) and busboards, I now continuing with planning and building the case. The main idea is to have wooden side wings which will enclose the aluminium rear and bottom panel. The construction will be kept together by threaded rods.
A bit more exact sketch of the case. The measurements are almost correct, the thickness of the side wings is 22mm. The case is planned as a double 19 inch sized case. The Eurorack case from the viewed from the other side.
I have most of the parts together, except the rear and bottom panels which will be made of bent aluminium plates. The idea is to pulver coat the aluminium parts after they are bended and the mount holes for the PSUs and busboards are drilled. The shape of the side wings need to be routed, as well as a thin groove that hold the aluminium panels. Still some manual work to do…
Parts for the Clicks and Clocks Eurorack console case with my self-manufactured power supplies and busboards and the double 19 inch rails.More parts for the Clicks and Clocks Eurorack console case with my self-manufactured power supplies and busboards and busboards and the double 19 inch rails.
For the moment the side wings are planned to be made of solid multiplex wood, which you see on the picture above. I still think about buying solid walnut for the wings as it looks much better.
Next steps are the detailed drawings for the wood works and the aluminium parts. I will keep you updated. By the way, some of the PSUs and busboards are still available, just ask for the conditions.
If you want to read the full story, here are all the posts: